I’ve seen too many people overcomplicate their first CNC projects. They start with something too detailed, mess up a few cuts, and then their machine just sits in the corner collecting dust.
You don’t need that. What you need are projects that work, ones that are easy enough for a beginner but still good enough to sell if you want to make some money.
That’s exactly what I’ll show you in this guide.
I’ve picked 8 CNC router projects that are:
- Beginner-friendly (no advanced skills required).
- Practical (things you’ll actually use or sell).
- Fun to make (so you don’t get frustrated and quit).
By the time you finish reading, you’ll have a list of ideas that are realistic and profitable, without the headaches of overly complicated designs.
Let’s jump in!
CNC Router Projects Table
Before we jump into the details, here’s a quick overview of 8 beginner-friendly CNC projects. Whether you want to learn new skills, make something useful, or even sell your work, this table will help you compare each project at a glance:
| Project | Skills Learned | Materials Needed | Why It’s a Great Beginner Project |
| Simple Wooden Signs | Text engraving, basic cutting | MDF, plywood, or solid wood | Easy design, quick to cut, customizable for personal or business use. |
| Coasters and Drink Trays | Precision cutting, engraving | Small wood pieces (MDF, bamboo) | Quick to make, minimal material cost, great for gifts or sales. |
| Keychains and Name Tags | Fine engraving, small-scale cutting | Acrylic, MDF, or wood sheets | Simple, high-profit margin, perfect for testing engraving settings. |
| Phone and Tablet Stands | Slot-fitting, cutting angles | MDF, plywood, or acrylic | Functional, easy to assemble, great for home or office. |
| Wall Clocks | Circular cutting, engraving techniques | MDF, plywood, clock mechanism kit | Stylish, functional, high-value item for home decor. |
| Decorative Wall Art | Detailed engraving, 2D/3D cutting | Plywood, MDF, or hardwood | Great for learning intricate designs, popular as gifts or decor. |
| Puzzle Games & Brain Teasers | Precision cutting, fitment accuracy | MDF, plywood, or acrylic | Fun to make, great for selling or gifting, uses small wood scraps. |
| Jewelry and Accessories | Small-scale detailing, engraving | Small wood, acrylic, or metal sheets | Lightweight, high-margin products, easy to customize. |
| Small Furniture Pieces | Slot-fitting, assembly techniques | Plywood or MDF | Functional, beginner-friendly furniture, teaches structure and design. |
Now that you’ve seen what’s possible, it’s time to choose your first (or next) CNC project.
Let’s go deeper into each one and help you get started.
1. Simple Wooden Signs
Ever looked at a handcrafted wooden sign and thought you could make that? You’re right.
Simple wooden signs are one of the best beginner CNC router projects. They’re easy to design, quick to cut, and great for learning the basics without frustration.
With just a few materials, you can create custom nameplates, house numbers, or even business signs. Whether you want to personalize your home or start selling online, this project is a great way to practice precision cutting and engraving.
Plus, wooden signs never go out of style, people love rustic décor, and businesses always need signage.
What You’ll Need
You don’t need much to make a wooden sign. A CNC router is the most important tool, but aside from that, the list is short:
- Wood material: MDF, plywood, or solid wood all work well.
- A cutting or engraving bit: A V-bit is great for detailed letters.
- Design software: Free programs like Carbide Create or Easel make setup easy.
- Sandpaper and finish: If you want smooth edges and a polished look.
The good news is you don’t need expensive materials to start. Even scrap wood is great for testing your designs before cutting larger pieces.
Steps to Complete This Project
- Choose Your Wood: MDF is budget-friendly, plywood is sturdy, and solid wood gives a premium look.
- Design Your Sign: Use software like Easel or Carbide Create to create text-based designs. Start simple—block letters work best.
- Set Up Your CNC Router: Secure your wood with clamps to prevent shifting during the cut.
- Select the Right Bit: A V-bit works well for engraving letters, while an end mill is best for cutting out the sign’s shape.
- Test Your Design on Scrap Wood: Run a small test piece to check depth, speed, and alignment.
- Start the Cutting Process: Load your design, adjust speed settings, and begin the engraving or cutting.
- Sand the Edges: Smooth out any rough spots with sandpaper.
- Apply a Finish: Use stain, paint, or a protective sealant to enhance durability and appearance.
Tips for a Smooth Project
- Keep it simple: Bold fonts and basic shapes are easier to cut.
- Test your depth settings: Too deep makes rough edges, too shallow won’t stand out.
- Secure your wood: Clamps prevent shifting and mistakes.
- Experiment with stains or paint: A small touch can make a big difference.
- Consider selling your work: Personalized signs for homes and businesses sell well.
Wooden signs help you learn CNC basics, tool movement, and finishing techniques without frustration. They’re also a great way to start turning your hobby into a business.
2. Coasters and Drink Trays
I never thought coasters would be the project that got me hooked on CNC routing. But after making my first set, I realized why they’re one of the best beginner-friendly projects.
They’re small, quick to cut, and don’t require much material. You don’t have to worry about deep cuts, complicated assembly, or expensive wood.
Even better? They’re actually useful. Whether you’re making them for yourself or planning to sell, coasters are a great way to practice precision while creating something people want.
And if you like variety, this project offers plenty. You can make them from wood, acrylic, or resin. You can keep them plain, engrave patterns, or even add inlays.
There’s no shortage of ways to make them stand out.
What You’ll Need
The materials for coasters are simple. Since they’re small, you don’t need large sheets of wood or complex setups. Here’s what you’ll need:
- Small wood pieces: MDF, bamboo, or plywood work well.
- A CNC router: Even a small desktop model can handle coasters.
- An engraving or cutting bit: A V-bit works best for fine details.
- Sandpaper: Smooth edges make a big difference.
- Wood stain or sealant: Protects the wood and adds a finished look.
You can also experiment with acrylic or resin for a modern, sleek style.
Steps to Complete This Project
- Choose Your Material: Select wood, acrylic, or resin based on the look you want.
- Design Your Coaster: Use software like Carbide Create or Easel to create a simple shape (square, circle, hexagon).
- Set Up Your CNC Router: Secure the material to the work surface using clamps.
- Choose the Right Bit: A V-bit is best for engraving details, while an end mill works well for cutting out shapes.
- Run a Test Cut: Use a scrap piece of wood to check depth and speed settings before cutting the final piece.
- Cut or Engrave the Design: Load your design, start the machine, and watch as your coaster takes shape.
- Sand the Edges: Smooth out any rough spots for a polished finish.
- Apply a Finish: Use wood stain, sealant, or paint to enhance durability and style.
Tips for a Smooth Project
I made my first coasters too thin. They looked great but felt flimsy. Thickness matters, aim for at least ¼ inch for durability. Here are some other lessons I picked up along the way:
- Try engraved patterns: Simple geometric designs or custom logos make coasters unique.
- Make them in sets: People usually buy coasters in groups of four or six. Selling them this way adds value.
- Offer customization: Businesses love engraved logos. Personalized coasters also make great wedding or housewarming gifts.
Coasters may seem simple, but they teach you a lot. You’ll learn how to adjust speeds, test depths, and experiment with different finishes.
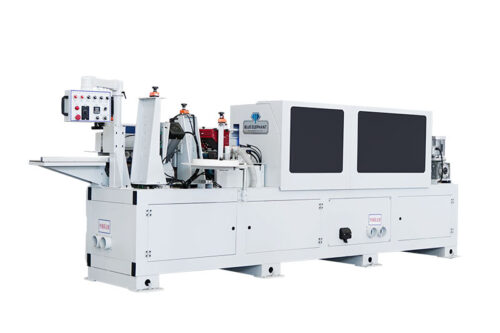
Of course, having the right CNC router makes all the difference.
Whether you’re starting small or thinking long-term, Blue Elephant offers reliable and high-precision CNC machines that grow with your skills.

3. Keychains and Name Tags
I didn’t think much about keychains until I made my first one with a CNC router. It was a simple design, a name engraved on a small wooden rectangle. But when I saw the finished piece, I realized that small projects can have a big impact.
Keychains and name tags are one of the easiest CNC projects to start with. They’re small, quick to cut, and don’t require a lot of material. That means less waste and more chances to practice. Plus, they make great gifts, business branding tools, or even a small side business.
If you’re looking for a low-cost, high-profit project that also helps you improve your engraving and cutting skills, this is it.
What You’ll Need
Since keychains are small, you don’t need a lot of materials. Here’s what works best:
- Acrylic, MDF, or wood sheets: Each material gives a different look.
- A CNC router: Even a basic model can handle these cuts.
- Laser or V-bit for engraving: A V-bit works well for fine details.
- Keyring loops: Attachments to turn your cuts into functional keychains.
You can also experiment with metal if your CNC router supports it.
Steps to Complete This Project
- Choose Your Material: Wood gives a rustic look, acrylic looks modern, and MDF is budget-friendly.
- Design the Keychain: Use Carbide Create or Easel to create simple shapes, circles, rectangles, or even custom outlines.
- Add Text or Graphics: Engrave names, logos, or symbols to personalize each piece.
- Secure the Material: Clamp it down to prevent shifting during cutting.
- Select the Right Bit: A V-bit is best for engraving, while an end mill works well for cutting out shapes.
- Run a Test Cut: Try a small sample to check engraving depth and cut speed.
- Cut and Engrave the Design: Load the file, adjust settings, and start the machine.
- Smooth the Edges: Use sandpaper to remove any rough edges.
- Attach Keyring Loops: Drill a small hole if needed and insert the ring.
- Apply a Finish (Optional): Add stain, sealant, or paint for durability and style.
Tips for a Smooth Project
As with any small CNC project, small mistakes are noticeable. Here are a few ways to make sure your keychains turn out great:
- Offer custom names and logos: Businesses love branded keychains, and personalized gifts sell well.
- Try different materials: Wood has a handcrafted feel, acrylic looks sleek, and metal adds a high-end touch.
- Make bulk orders: Corporate events, weddings, and giveaways often need large quantities.
- Use simple fonts: Intricate script fonts can be hard to cut cleanly, so start with bold, easy-to-read text.
- Keep the size practical: Too big, and it won’t fit in a pocket. Too small, and the engraving might not be clear.
4. Phone and Tablet Stands
Before I had a proper stand, I used to balance my phone against a coffee cup while working at my desk. It would tip over at the worst moments, usually in the middle of a video call.
When I finally made a CNC-cut phone stand, I wondered why I hadn’t done it sooner.
Phone and tablet stands are simple, functional, and easy to make. They don’t require a lot of material, and they give you great practice with precision cutting. Plus, they can be customized with names, logos, or unique designs, making them great for personal use or as gifts.
This project also helps beginners learn slot-fitting, where two or more pieces connect without screws or glue. If you’ve never made a slotted design before, this is a great way to start.
What You’ll Need
To make a sturdy phone or tablet stand, you’ll need just a few materials:
- MDF, plywood, or acrylic: Each has a different look and feel, so choose based on style preference.
- A CNC router: Even a small desktop machine can handle this project.
- Sandpaper: Smooths out rough edges for a clean finish.
- Paint or stain (optional): Adds a polished look to the final product.
Steps to Complete This Project
- Choose Your Material: Plywood works well for a natural look, while acrylic gives a sleek, modern style.
- Design the Stand: Use software like Carbide Create or Easel to create a simple two-piece design, one for the base and one for the backrest.
- Set Up Your CNC Router: Secure your material to prevent shifting.
- Select the Right Cutting Bit: A straight end mill works well for cutting out the pieces.
- Test the Slot Fit on Scrap Material: The slots should fit snugly, but not too tight.
- Cut the Final Pieces: Load your design, run the CNC router, and let it do the work.
- Sand the Edges: Smooth out any rough areas for a clean finish.
- Assemble the Stand: Slot the pieces together, no screws or glue needed.
- Customize with Engraving or Paint: Add names, logos, or patterns for a premium look.
Tips for a Better Project
I made my first stand too loose, and my phone kept sliding off. Here are some things I learned:
- Use snap-fit joints: If you design the slots just right, the pieces will hold together without glue.
- Test the angle: A slightly tilted backrest is more comfortable for viewing.
- Make different sizes: A larger version works great for tablets.
- Sell as desk accessories: Custom-engraved stands make great gifts and business branding items.
5. Wall Clocks
I used to think making a clock would be complicated. All the numbers, the perfect circle, the moving hands, it seemed like something best left to professionals. But when I finally tried it with my CNC router, I realized it was easier than I expected and a great way to practice new skills.
Wall clocks are more than just decorations. They’re functional, visually appealing, and a great way to learn circular cutting and engraving techniques. You can make them from wood, acrylic, or even metal, depending on the look you want.
What You’ll Need
To make a CNC-cut clock, you’ll need a few essential materials:
- MDF or plywood: Both are easy to cut and customize.
- A CNC router: Any standard model can handle clock designs.
- A clock mechanism kit: This includes clock hands and the battery-operated motor.
- Paint or stain (optional): Helps add a finished, polished look.
Steps to Complete This Project
- Choose Your Material: Wood is a popular choice for a classic look, but acrylic works well for modern designs.
- Design the Clock Face: Use software like Carbide Create or Easel to create a perfect circle with evenly spaced numbers or markers.
- Secure the Wood on the CNC Bed: Make sure it’s held down properly to prevent shifting.
- Select the Right Cutting Bit: An end mill works well for cutting out the shape, while a V-bit is great for engraving numbers or designs.
- Run a Test Cut: Use scrap material to check depth settings and accuracy before cutting the final piece.
- Engrave or Cut the Numbers: Choose a simple layout or experiment with Roman numerals, bold numbers, or minimalistic dots.
- Drill a Hole for the Clock Mechanism: This needs to be centered perfectly for the hands to rotate evenly.
- Sand and Finish the Surface: Smooth edges and apply stain, paint, or a protective seal.
- Attach the Clock Mechanism: Insert the hands and secure the motor on the back.
- Hang and Enjoy: Your clock is now ready to use or sell!
Tips for a Smooth Project
When I made my first clock, I didn’t align the numbers properly. The result? A clock that looked off-center and hard to read. Here are a few things I learned:
- Use a template: Spacing the numbers evenly is key to a professional look.
- Create themed clocks: Sports logos, vintage styles, or modern minimalist designs sell well.
- Offer personalization: Engraved names or business logos add value.
- Test different materials: Acrylic gives a sleek, high-end feel, while wood looks timeless.
- Sell online or at craft fairs: Custom clocks are always in demand, especially during the holidays.

6. Decorative Wall Art and Engravings
The first time I tried making CNC wall art, I was overwhelmed by the possibilities. Should I engrave a nature scene? Try a geometric pattern? Cut out a layered 3D design? I quickly realized that decorative wall art is one of the most creative CNC projects you can do.
It’s a perfect project for beginners because it teaches detailed engraving, cutting, and inlay techniques. You can start simple like carving out a basic design on a wooden plaque and gradually work up to more intricate pieces.
Wall art sells well, too. Whether it’s a personalized family sign, a modern abstract piece, or a nature-inspired engraving, people love custom decor for their homes and offices.
What You’ll Need
You don’t need a lot of tools to create decorative wall art, just the basics:
- Plywood, MDF, or hardwood: Each material gives a different look and texture.
- A CNC router: Even an entry-level model can handle basic engraving and cutting.
- Finishing products: Paint, oil, or sealant can enhance the design and protect the wood.
Steps to Complete This Project
- Choose Your Material: MDF is great for painted designs, while hardwood looks stunning with natural finishes.
- Design Your Artwork: Use software like Easel or Carbide Create to create a simple vector image.
- Secure Your Material: Clamp your wood onto the CNC bed to prevent movement.
- Select the Right Bit: A V-bit is ideal for engraving, while an end mill is best for cutting out shapes.
- Run a Test Engraving: Use a scrap piece to check depth and speed settings before committing to your final piece.
- Engrave or Cut the Design: Load your file, start the CNC router, and let the machine carve out your artwork.
- Sand and Finish: Smooth any rough edges and apply paint, stain, or a protective sealant.
- Mount or Frame the Piece: Depending on the design, you can attach hooks or create a floating frame for a polished look.
Tips for a Smooth Project
When I made my first piece of CNC wall art, I chose a design that was too detailed. The fine lines didn’t cut well, and the result wasn’t as crisp as I wanted. Here’s what I learned:
- Start with simple vector images: Bold, clean shapes engrave better than tiny, intricate details.
- Try multi-layered designs: Combining different layers of wood creates a striking 3D effect.
- Experiment with inlays: Cutting out one design and inserting a contrasting material adds depth.
- Market to the right buyers: Interior designers, decorators, and Etsy customers love unique CNC wall art.
- Offer custom engraving: Personalized quotes, names, or business logos add value.
Wall art is one of the most enjoyable CNC projects because there’s no limit to what you can create.
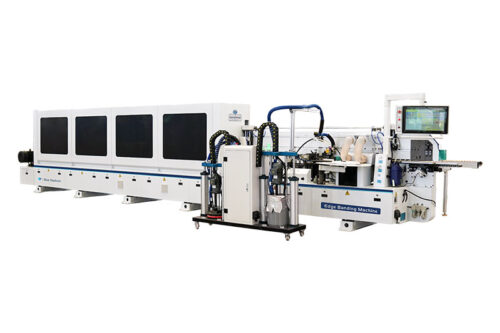
But creativity needs the right tools. A high-precision CNC router can help you turn any design into a stunning finished piece.
At Blue Elephant, we build powerful, reliable CNC machines for beginners and professionals alike. If you’re ready to expand your projects and bring your ideas to life, explore our range of CNC routers designed for precision and efficiency.
7. Puzzle Games and Brain Teasers
I’ve always loved puzzles, but I never thought about making one until I had a CNC router. The first time I cut a simple jigsaw puzzle, I realized how precise and satisfying this type of project can be. It wasn’t just fun, it was a great way to improve my cutting accuracy.
Puzzles are an ideal beginner project because they teach precision cutting without requiring complicated assembly. Plus, they’re a great way to use up scrap wood instead of throwing it away. Whether you’re making classic jigsaw puzzles, name puzzles for kids, or brain teasers, these projects are both fun and marketable.
What You’ll Need
To create a puzzle, you don’t need a lot of materials. Here’s what works best:
- MDF, plywood, or acrylic: Wood creates a classic look, while acrylic adds a modern touch.
- A CNC router: Even a small desktop machine can handle puzzle cutting.
- Puzzle design files: You can create your own or find free templates online.
Steps to Complete This Project
- Choose Your Material: Plywood works well for durability, while MDF is great for smooth cuts.
- Select a Puzzle Design: Start with simple jigsaw shapes or name puzzles before moving to more complex patterns.
- Set Up Your CNC Router: Secure the material with clamps to prevent shifting.
- Use the Right Bit: A small end mill bit (like 1/8″) is best for clean, precise cuts.
- Run a Test Cut on Scrap Material: This helps fine-tune your depth and speed settings.
- Cut the Puzzle Pieces: Load your design and let the CNC router carve out each section.
- Sand the Edges: Smooth out rough edges so the pieces fit together easily.
- Paint or Seal the Puzzle (Optional): A finish adds durability and enhances the final look.
Tips for a Smooth Project
The first puzzle I made had pieces that didn’t fit well. I had cut too fast, and the router left rough edges. Here’s what I learned:
- Start with simple shapes: Basic jigsaw puzzles are easier to cut and assemble.
- Test the fit before finalizing: A small error in cutting can make the pieces too loose or too tight.
- Make name puzzles for kids: Parents love personalized puzzles for their children.
- Sell educational puzzles: Schools and learning centers often look for creative teaching tools.
- Bundle small puzzles together: Sets of themed puzzles sell better than single pieces.

8. Jewelry and Accessories
The first time I made a piece of jewelry with my CNC router, I was surprised at how small details made a big difference. A slight change in cutting speed, a better sanding technique, or even the right finishing touch could turn a simple cutout into something that looked professional.
Jewelry and accessories are great beginner projects because they’re small, easy to make, and don’t require a lot of material. They also help you practice precision detailing, which is essential for more complex CNC work. If you want to sell your creations, jewelry has a high-profit margin, custom pieces can sell for much more than their material cost.
You can make earrings, pendants, bracelets, or even keychains using wood, acrylic, or metal. Each material gives a different look and style, making this a flexible and creative project.
What You’ll Need
Jewelry-making with a CNC router doesn’t require much, but here’s what you’ll need:
- Small sheets of material: Wood for a natural look, acrylic for a modern style, or metal for durability.
- A CNC router: A compact machine works well for these delicate designs.
- Jewelry hooks, chains, or clasps: These turn cutouts into wearable pieces.
Steps to Complete This Project
- Choose Your Material: Wood is lightweight and rustic, acrylic is sleek and colorful, and metal offers a premium feel.
- Design Your Jewelry Piece: Use software like Easel or Carbide Create to create a simple pendant, earring, or charm design.
- Secure Your Material: Clamp it to your CNC bed to prevent shifting.
- Select the Right Cutting Bit: A small end mill is ideal for fine details, while a V-bit works well for engraving.
- Run a Test Cut: Scrap material helps fine-tune your speed and depth settings.
- Cut Out the Design: Let the CNC router carve the shape with clean, precise lines.
- Sand the Edges: Smooth surfaces make the final piece look polished and professional.
- Drill Small Holes for Hooks or Chains: If needed, add attachment points for jewelry findings.
- Apply a Finish: Stain, paint, or resin can enhance the final look and durability.
- Assemble the Jewelry: Attach hooks, chains, or clasps to complete the piece.
Tips for a Better Project
Here are some other things I picked up along the way:
- Create custom name necklaces or earrings: Personalized jewelry sells well.
- Experiment with shapes and themes: Geometric, floral, and minimalist designs are popular.
- Layer materials for a unique look: Combining wood and acrylic creates an eye-catching contrast.
- Market as handmade artisan pieces: Selling jewelry on Etsy, craft fairs, or local boutiques can be profitable.
- Offer custom engraving: Names, initials, or special dates make jewelry more meaningful.
Conclusion
Every great CNC maker started somewhere. Maybe with a simple sign or keychain. Something small, but something that sparked an idea.
Now, it’s your turn.
You have 9 great projects to choose from, each one designed to help you build skills and confidence.
Which one will you make first? Whatever you decide, just start. The best way to learn is by doing.
And when you’re ready to take your skills even further, Blue Elephant is here to help.
Contact us today and find the CNC machine that fits your vision!
Recommended Reads for You
If you’re looking for more insights, we’ve put together a list of helpful articles that you might enjoy:
Still haven’t found what you’re looking for? Don’t hesitate to contact us. We’re available around the clock to assist you.