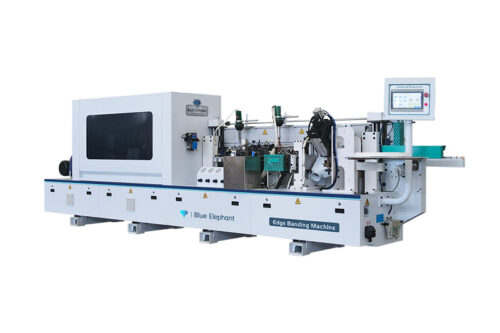
The first time I assembled a CNC machine, I underestimated how one misaligned component could throw off the entire system. What should have taken hours ended up being a week-long troubleshooting headache.
That experience taught me that CNC assembly isn’t just about putting parts together—it’s about precision, efficiency, and avoiding expensive mistakes.
After working with numerous manufacturers and machine shops, I’ve compiled the most reliable step-by-step process used by industry professionals.
You’ll get a clear, structured breakdown of each assembly stage, from preparing components to running final diagnostics. If you’re looking for a practical, no-nonsense guide to assembling a CNC machine the right way, this is it.
Let’s dive in!
Step #1: Planning and Pre-Assembly Preparation
Before you even touch a wrench, take the time to plan things out. I’ve seen businesses dive straight into assembly, only to realize halfway through that a key part is missing or something basic got overlooked. A bit of prep up front can save you from frustrating delays down the line.
- Verify Components & Tools: Go over the parts list and match it with the supplier’s documentation. If something’s missing or mismatched, it can bring the whole process to a halt.
- Designate a Clean, Organized Work Area: A tidy workspace helps you work faster and with fewer errors. Keep tools and components close at hand so you’re not constantly walking back and forth.
- Review the Manufacturer’s Manual: Every CNC machine has its quirks. The manual might not be the most thrilling read, but skipping it can lead to mistakes that affect how well everything runs later.
- Assign Roles if Working as a Team: When more than one person’s involved, it helps to make responsibilities clear from the start. That way, people aren’t stepping on each other’s toes or duplicating work.
- Set Up a Reliable Power Source and Good Lighting: You’ll want to test things as you go, so make sure there’s power nearby. And don’t overlook lighting—poor visibility makes it easier to miss alignment issues.

Step #2: Frame and Base Installation
The frame is what everything else depends on. If it’s not properly aligned from the beginning, the machine will never perform the way it should. I’ve seen minor frame issues snowball into major accuracy problems later, so this step deserves extra attention.
- Set Up on a Level Surface: Make sure the base sits on a truly flat and stable surface. Even a slight tilt can throw off your cuts and cause wear on moving parts over time.
- Secure Fastenings: Tighten all bolts according to the torque values provided in the manual. If anything is left loose, you’ll likely notice vibrations or shifting during operation.
- Check for Squareness: Use accurate measuring tools to verify that all angles and axes line up correctly. Skipping this step can lead to parts being slightly off, and those errors can add up.
- Reinforce the Frame if Needed: Larger machines sometimes need extra support to prevent flexing. If your frame feels even slightly unstable, it’s worth adding bracing before moving on.
- Install Anti-Vibration Pads: These pads help absorb operational movement and reduce noise. They also help keep the machine steady, which improves cutting accuracy.
Step #3: Linear Motion System Assembly
The linear motion system is where precision really starts to take shape. If anything’s off during this part of the build, you’ll end up chasing accuracy issues that are hard to diagnose later. I’ve worked with teams who spent weeks tweaking settings, only to discover the real issue was hidden in the rails.
- Install Linear Rails and Bearings: Line everything up carefully before tightening it down. Misalignment at this stage can cause uneven motion and wear that shows up sooner than you’d expect.
- Check for Smooth Motion: Manually move the bearings along the rails to spot any tight spots or resistance. If anything feels rough, take the time to realign and test again before proceeding.
- Adjust for Preload and Tension: Get the balance right between too tight and too loose. Too much pressure will wear things out quickly, while too little can lead to unwanted vibrations.
- Lubricate Rails and Bearings: Add the correct type and amount of lubricant to keep everything running smoothly. Dry rails tend to create jerky motion and reduce your machine’s accuracy.
- Secure Linear Guides Firmly: Once everything is aligned and tested, bolt the guides down tightly. Any shifting during use will throw off your cuts and affect repeatability.
Step #4: Spindle and Motor Installation
The spindle and motor do the heavy lifting when it comes to cutting, so getting this step right makes a noticeable difference in your machine’s performance. I’ve found that even minor alignment issues here can lead to rough finishes and early tool wear.
- Mount the Spindle Securely: Make sure the spindle is firmly braced and doesn’t shift under pressure. Any vibration will affect the quality of your cuts and may damage the workpiece.
- Align the Spindle Properly: It should be perfectly perpendicular to the table surface. Even a small tilt can throw off your cutting depths and increase the risk of breaking tools.
- Check Belt or Coupling Tension: Set the tension carefully. If it’s too tight, you could strain the motor; too loose, and you’ll lose cutting power or see inconsistent results.
- Install Cooling Mechanisms: If your spindle uses a fan or liquid cooling, double-check that everything is hooked up correctly. Without proper cooling, overheating can lead to long-term damage.
- Test Spindle Movement by Hand: Give the spindle a spin before turning on the power. If it feels rough or catches, go back and check the alignment before continuing.

Step #5: Electrical and Control System Setup
Now comes the part that makes most people slow down a bit, wiring up the machine’s power and control systems. I’ve learned the hard way that even a small mistake in this step can create hours of frustration later. It’s worth taking your time and double-checking everything as you go.
- Follow Wiring Diagrams Precisely: Take the wiring diagram seriously and match it to your actual connections before flipping the switch. One wrong wire can damage a component or create a serious safety issue.
- Ground the System Properly: A solid ground connection helps protect your electronics from interference or voltage spikes. It also helps your system run more consistently.
- Test Each Connection Before Powering Up: Use a multimeter to check continuity on each wire. Catching a loose or miswired connection now can save hours of troubleshooting later.
- Use Proper Insulation on All Wires: Make sure nothing is exposed that shouldn’t be. Good insulation prevents short circuits and keeps your setup safer during operation.
- Label All Key Electrical Components: Mark relays, terminals, and major connectors clearly. It’ll make future maintenance faster and reduce confusion when something needs adjusting.
Step #6: CNC Controller and Software Configuration
Without a properly configured controller, your CNC machine won’t run the way it should. I’ve watched teams get frustrated with jittery movements or misaligned cuts, only to trace the issue back to a few overlooked settings. This part might feel technical, but it’s absolutely worth the focus.
- Install and Configure the CNC Software: Stick closely to the manufacturer’s setup instructions for control parameters. Getting these settings right makes a huge difference in how smoothly your machine runs.
- Check Axis Movements: Test each axis to confirm it moves in the correct direction and distance. Even a small mistake here can result in inaccurate cuts or reversed toolpaths.
- Calibrate Stepper or Servo Motors: Fine-tune the motor steps to match your machine’s design. When motors aren’t calibrated correctly, your finished parts won’t match your drawings.
- Set Up Homing and Limit Switches: These switches help define the machine’s working boundaries and protect it from overtravel. Skipping them risks crashes and physical damage.
- Run a Software Simulation: Load up a sample file and simulate the cut before you start the machine. This quick check often catches programming mistakes or axis errors that would waste material.
Step #7: Coolant and Lubrication System Installation
A CNC machine’s coolant and lubrication system is crucial for maintaining smooth operation and preventing excessive wear. Without proper installation, overheating and friction can cause long-term damage to critical components.
- Install the Coolant Lines Properly: Poor installation can lead to uneven coolant distribution. Ensure that each nozzle is positioned to provide full coverage to the cutting area.
- Verify the Lubrication System: Without proper lubrication, mechanical parts will wear out faster. Check that oil and grease lines are installed correctly and reaching critical components.
- Check for Leaks: Small leaks in the coolant system can cause major issues over time. Run a test flow to identify and fix any potential leakage points.
- Use the Correct Coolant Type: Not all coolants work for every machine. Make sure you are using a coolant recommended by the manufacturer for optimal performance.
- Monitor Flow Rate and Pressure: Insufficient coolant flow can lead to overheating, while excessive pressure may damage the system.

Step #8: Safety Features and Enclosures
No matter how confident you are in your setup, safety should never be treated as an afterthought. I’ve worked with teams that overlooked simple precautions, only to face costly accidents or damaged equipment. Taking a little extra time here can protect both people and machines.
- Install Emergency Stop Buttons: Make sure stop buttons are easy to reach from multiple angles around the machine. In the event of a malfunction, you’ll want to react fast and cut power instantly.
- Set Up Safety Interlocks: These systems automatically stop the machine when an access panel or door is opened. It’s a smart way to avoid injuries from unexpected movements.
- Secure All Enclosures: Cover all moving parts with solid, reliable guards. A well-secured enclosure keeps chips, dust, and fragments from flying out and causing harm.
- Review Fire Safety Measures: If you’re working with flammable materials or generating heat, have a fire suppression setup nearby. Adding fire-resistant panels or shields can offer an extra layer of protection.
Step #9: Calibration and Initial Testing
Once everything is assembled, don’t rush into production. This is your chance to fine-tune the machine and catch any last-minute issues. I’ve seen projects derailed because this step was skipped or rushed, and trust me, it’s not worth the gamble.
- Run a Homing Cycle: Let the machine find its starting point before doing anything else. Without this step, you risk alignment problems that throw off your entire job.
- Perform a Dry Run: Load your program and run it without cutting material. This lets you watch the machine in action and spot anything unusual before real work begins.
- Test Precision and Accuracy: Use calipers or a dial indicator to check if the machine is hitting the right marks. If things feel slightly off, tweak the motor settings to dial in more accurate movement.
Step #10: Final Quality Checks and Commissioning
This is the final checkpoint before your machine gets to work. After all the effort put into assembly, it’s worth giving everything one more look. I’ve seen machines go into production too soon, only to break down a few hours later from something as simple as a loose bolt or missed setting.
- Inspect All Connections: Go over every bolt, wire, and fastening to make sure nothing is loose or overlooked. A few extra minutes here can prevent frustrating breakdowns later on.
- Run an Extended Test Cycle: Let the machine run under real operating conditions for a while. This helps you spot overheating, missed settings, or anything else that might not show up in a quick test.
- Document the Assembly Process: Keep notes and photos of how everything was installed and set up. This record will be a lifesaver when it comes time for maintenance or troubleshooting.
Conclusion
You’ve now seen what it takes to assemble a CNC machine from start to finish. From careful planning to final testing, every step matters.
If you’re feeling overwhelmed, don’t be. I’ve been there. It’s all about taking one step at a time.
Start now. Lay out your workspace. Print that checklist. Take action.
Have questions or need help getting started?
Contact Blue Elephant today! We’re here to help you bring your CNC vision to life.
Explore More Helpful Resources
Want to learn more? Here are some articles filled with valuable tips and information to guide you further:
Still haven’t found what you’re looking for? Don’t hesitate to contact us. We’re available around the clock to assist you.