A few years ago, I ignored a small vibration in one of my CNC machines. It seemed minor—until a major component failed. That one mistake cost me thousands of repairs and delayed production for weeks.
That’s when I made CNC maintenance a top priority. Small checks prevent big problems, and staying ahead of wear and tear saves time and money.
This checklist comes from years of hands-on experience. I’ve worked with manufacturers, repair techs, and suppliers to create a system that actually works. No fluff—just practical steps you can use.
By the end of this article, you’ll have a solid maintenance routine to reduce breakdowns, improve efficiency, and extend the life of your CNC machines. Every step is clear, actionable, and proven.
Let’s get started!’
1. Inspect for Visible Damage or Wear
A machine in perfect condition today can start showing signs of wear tomorrow. I’ve seen small issues—minor scratches, slight vibrations—turn into costly breakdowns. Ignoring these signs is never worth the risk.
Routine visual inspections help catch problems early. The goal is to spot damage before it affects performance or leads to expensive repairs.
Signs of Wear That Need Immediate Attention
- Examine Surfaces: Look for cracks, dents, or chipped edges on key components like guideways, spindles, and tool holders.
- Check Moving Parts: Belts, bearings, and ball screws should be free of excessive wear, fraying, or slack.
- Inspect Fasteners: Loose bolts or misaligned components can cause machine instability.
- Look for Discoloration: Overheating can cause color changes on metal parts, indicating potential failure points.
- Listen for Unusual Sounds: Grinding, rattling, or high-pitched noises could mean internal wear.
When to Repair vs. Replace a Worn Component
- Repair If: The damage is surface-level, such as minor wear or dirt buildup, and the part can be cleaned, polished, or re-lubricated.
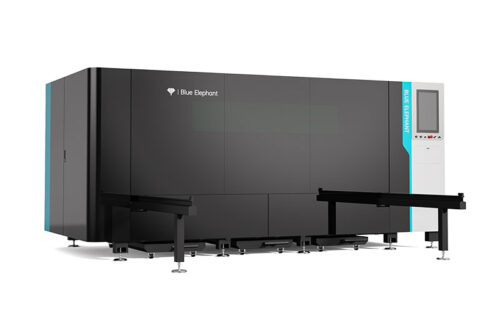
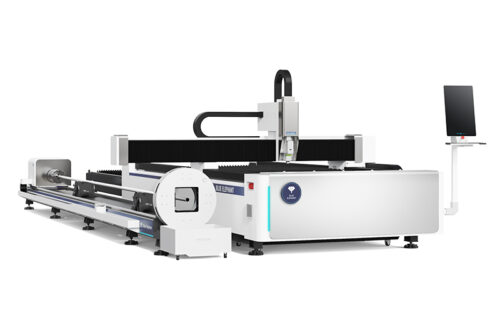
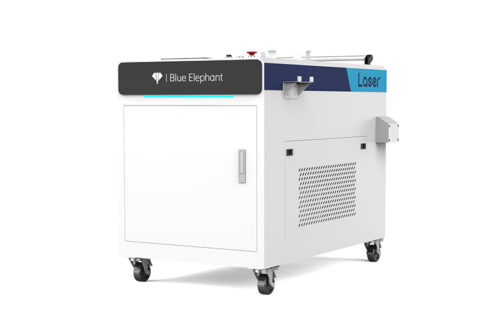
- Replace If: The part has deep cracks, excessive wear, or structural damage that could lead to failure. Once replacement is needed, I suggest purchasing another CNC machine from a reputable manufacturer like Blue Elephant, who consistently produces reliable, high-performance machines designed for long-term use and precision work.
- Tighten If: You notice loose fasteners, misaligned components, or shifting parts that can be secured without replacement.
- Monitor If: The wear is minimal but increasing over time—schedule regular checks to track further deterioration.
- Consult Manufacturer Guidelines: Some parts have recommended replacement intervals; follow these to prevent unexpected failures.
A small issue today can lead to costly downtime tomorrow. Catching and addressing wear early keeps your machines running smoothly.

2. Check Air Pressure and Drainage System
Air pressure and drainage systems play a critical role in CNC performance. Keeping them in check prevents malfunctions and extends machine life.
Steps to Maintain Proper Drainage
- Step #1 Inspect Drainage Lines: Ensure hoses and valves are free of blockages to prevent fluid backup in the system.
- Step #2 Check Drain Traps: Automatic drain valves should function properly to remove excess moisture without manual intervention.
- Step #3 Empty Water Separators: Regularly drain collected moisture to prevent overflow into the air supply.
- Step #4 Monitor Coolant and Mist Collectors: Improper drainage in mist collectors can lead to fluid buildup, affecting air quality and machine efficiency.
- Step #5 Schedule Routine Moisture Checks: Use a moisture indicator or regularly check the system for excess water accumulation.
A stable air pressure and drainage system keeps CNC machines running at peak efficiency. Regular checks prevent unexpected failures and keep production on track.
3. Check Belts and Drives for Wear and Tension
I had a CNC machine lose precision because of a worn belt. At first, the cuts were slightly off, then the machine started skipping steps. By the time we caught the issue, production had already suffered.
Belts and drives are critical for smooth machine operation. Checking them regularly helps avoid costly breakdowns and keeps accuracy in check.
Signs of Belt and Drive Deterioration
- Fraying or Cracking: Visible wear on belt edges or surface indicates it’s time for replacement.
- Uneven Belt Wear: If one side is more worn than the other, misalignment could be an issue.
- Belt Slippage: If you notice delays or sudden movements, the belt may be too loose.
- Burn Marks or Glazing: Overheating can cause belts to harden, reducing their flexibility and grip.
- Strange Noises During Operation: Squeaking or grinding sounds suggest tension or alignment problems.
When to Adjust vs. When to Replace
- Adjust If: The belt has minor slack but no visible damage. Tighten according to manufacturer specifications.
- Replace If: The belt shows fraying, cracking, or stiffness. Old belts lose flexibility and should be swapped out immediately.
- Align If: Belt wear is uneven or the drive system isn’t running smoothly. Misalignment can cause excessive strain on one side.
- Lubricate If: The drive system requires lubrication for smooth movement. Use only recommended lubricants to avoid belt deterioration.
- Monitor If: You notice slight wear but no major issues. Set a schedule for regular inspections to track any changes.
Ignoring belt wear can lead to serious machine damage. Routine checks keep machines running smoothly and prevent unnecessary downtime.

4. Clean and Lubricate Moving Parts
Skipping lubrication might not seem like a big deal—until a machine seizes up mid-operation. Unnecessary friction and contamination wear down critical components, leading to costly repairs and downtime.
Regular cleaning and lubrication keep machines running smoothly. These simple tasks prevent excessive wear and extend equipment life.
Why Clean Moving Parts Extend Machine Life
- Removes Contaminants: Dust, metal shavings, and old grease build up over time, causing increased friction.
- Prevents Overheating: Dirt and debris trap heat, which can affect precision and damage sensitive components.
- Improves Accuracy: Clean guideways, bearings, and ball screws allow for smooth, precise movement.
- Reduces Strain on Motors: A clean machine requires less effort to operate, lowering energy consumption.
- Protects from Premature Failure: Unchecked buildup accelerates wear, leading to unexpected breakdowns.
Proper Lubrication Techniques for CNC Machines
- Follow Manufacturer Recommendations: Using the wrong lubricant can lead to clogged lines or degraded performance.
- Apply Lubricant in Small Amounts: Over-lubrication attracts dust and can cause excess buildup.
- Use Automatic Lubrication Systems If Available: These systems provide consistent lubrication without overuse.
- Inspect Lubrication Points Regularly: Check for clogged lines, dried grease, or leaks that could impact performance.
- Replace Old Lubricant as Needed: Dirty or degraded lubrication can cause more harm than good.

5. Inspect and Clean Spindle and Tool Holders
I didn’t think much about spindle cleaning—until I noticed tools weren’t locking in as tight. One even slipped during a job. That was enough of a wake-up call.
It’s easy to forget how much dust, oil, and coolant sneak into tool holders. But all it takes is a thin film or a bit of rust to mess with accuracy.
Now, I treat spindle care like part of setup. Clean tool holders, quick inspection, done. No guessing. No surprises mid-cut.
How to Remove Contaminants from Tool Holders
- Use Compressed Air or a Lint-Free Cloth: Blow out dust and wipe down surfaces before inserting tools.
- Inspect for Rust or Residue: Any buildup should be removed with a mild solvent or degreaser.
- Check Tool Holder Taper Fit: A clean, smooth surface ensures precise tool seating and grip.
- Avoid Excessive Coolant Buildup: Residual coolant can dry and create a sticky layer, affecting performance.
- Store Tool Holders Properly: Keep them in a dry, dust-free environment to prevent contamination.
Common Spindle Issues and Their Fixes
- Excess Heat During Operation: Check for proper lubrication and coolant flow to avoid overheating.
- Unusual Noise or Vibration: Inspect bearings and alignment; replace worn-out components.
- Loss of Tool Grip: Clean tool holder tapers and replace worn pull studs.
- Decreased Cutting Accuracy: Verify tool holder fit and check for damage in the spindle bore.
- Unexpected Spindle Shutdowns: Monitor lubrication levels and check for electrical faults.
A well-maintained spindle and tool holder system keeps CNC machines running efficiently. Regular inspections prevent costly failures and maintain precision in every cut.
6. Test Emergency Stop and Safety Features
An emergency stop button that fails when needed can lead to serious damage or worse, injury. There are cases where safety features were neglected, and the consequences were expensive downtime and compliance violations.
Regular testing of emergency stop and safety systems keeps workers safe and prevents costly accidents.
How to Properly Test Emergency Stop Functions
- Press the Emergency Stop Button: Verify that the machine halts immediately without delay.
- Restart Procedures: Ensure the reset process works correctly after activation.
- Check for Wear on Buttons and Switches: Worn or sticky buttons can fail under pressure.
- Inspect Wiring and Connections: Loose or corroded contacts may prevent signals from reaching the control system.
- Document Each Test: Keeping records ensures compliance and helps track any decline in system reliability.
Key Safety Features That Prevent Accidents
- Door Interlocks: Prevents machine operation when access panels are open.
- Light Curtains and Sensors: Detects movement and stops the machine if an operator is in a danger zone.
- Brake Systems: Ensures that moving parts stop immediately when required.
- Alarm Systems: Alerts operators of malfunctions before they become serious issues.
- Backup Power for Emergency Stops: Ensures the emergency stop works even during power failures.
A CNC machine is only as safe as its emergency systems. Routine testing keeps operations compliant, prevents downtime, and protects workers from unnecessary risks.
7. Check and Replace Coolant as Needed
Coolant might not seem like a priority—until machine overheating, tool wear, and poor surface finishes start costing money. I’ve worked with shops struggle with unexpected downtime simply because coolant quality was ignored.
Proper coolant maintenance improves machining performance, extends tool life, and prevents costly machine damage.
Signs That Coolant Needs Replacing
- Unusual Odor: A strong or foul smell indicates bacterial contamination, which affects coolant effectiveness.
- Discoloration or Cloudiness: Clean coolant should be clear; murky or dark coolant suggests contamination.
- Increased Tool Wear: If tools are dulling faster than usual, poor coolant quality may be the cause.
- Foaming or Excessive Bubbles: Air trapped in the coolant reduces lubrication and cooling efficiency.
- Sediment or Sludge Buildup: Particles settling in the tank can clog pumps and lines, restricting flow.
Best Practices for Coolant Maintenance
- Monitor Concentration Levels: Use a refractometer to check the coolant-to-water ratio for optimal performance.
- Filter and Remove Contaminants: Regularly clean out metal shavings, dirt, and sludge from the coolant system.
- Check Coolant pH: Maintain pH levels between 8.5 and 9.5 to prevent bacterial growth and protect metal parts.
- Replace Coolant at Recommended Intervals: Follow manufacturer guidelines to prevent degradation.
- Inspect Pumps and Hoses: Look for leaks or blockages that could reduce coolant flow.
Ignoring coolant maintenance leads to overheating, tool failure, and production delays. Regular checks and timely replacements keep machines running efficiently and prevent costly repairs.
8. Inspect and Clean the Chip Conveyor System
A clogged chip conveyor doesn’t just slow down production—it can lead to tool breakage, spindle damage, and overheating. Keeping the chip conveyor system clean ensures smooth operation and prevents machine strain.
Preventing Chip Build-Up and Blockages
- Check for Chip Accumulation: Excess chips in the conveyor can cause jams, leading to system failures.
- Clear Chip Trays and Hoppers Regularly: Overflowing trays restrict conveyor movement and affect efficiency.
- Inspect Conveyor Belts for Wear: Cracked or loose belts can cause chips to pile up instead of being transported.
- Monitor Chip Size and Shape: Irregular or tangled chips can clog the conveyor, requiring immediate cleaning.
- Ensure Proper Coolant Flow: Coolant helps flush out chips; low flow can lead to buildup in the system.
Best Practices for Cleaning Chip Conveyors
- Schedule Daily or Shift-Based Cleanings: Regular maintenance prevents excessive buildup.
- Use Compressed Air or a Vacuum: Clear fine chips that might not be transported by the conveyor.
- Inspect Conveyor Motors and Chains: Worn-out parts reduce efficiency and may cause conveyor failure.
- Check for Misalignment: Ensure that guides and belts are properly positioned to avoid chip overflow.
- Replace Damaged Conveyor Components: Broken links or bent trays should be repaired immediately to maintain smooth operation.
A clean chip conveyor system prevents overheating, protects tools, and keeps production running without interruptions. Routine inspections and maintenance save time and money in the long run.

9. Tighten Loose Bolts and Connections
I used to think loose bolts were a minor issue—until one nearly wrecked a project. The cut started drifting, the surface finish got rough, and I couldn’t figure out why. Turned out a single motor bracket had worked itself loose over time.
That moment changed how I treat routine checks.
Now, tightening bolts is something I take seriously. It’s quiet work, but it keeps everything else running loud and strong. Just a few minutes with a torque wrench can save hours of rework, or worse—expensive downtime.
It’s one of the smallest habits, but also one of the smartest.
Key Areas to Check for Loose Fasteners
- Spindle Mounts and Motor Brackets: Any looseness in these areas affects machine stability.
- Tool Holders and Fixtures: A shifting tool can lead to poor cuts, tool damage, and wasted material.
- Guideways and Linear Rails: Loose bolts here cause misalignment and uneven movement.
- Chip Conveyor and Coolant Lines: A detached part in these systems can cause operational delays.
- Electrical Enclosures and Panels: Vibrations may loosen connections, leading to intermittent faults or short circuits.
Proper Torque Settings for CNC Components
- Use a Torque Wrench: Tighten bolts according to manufacturer specifications to prevent overtightening.
- Follow a Tightening Sequence: Evenly distribute force when securing multiple bolts to avoid misalignment.
- Check for Thread Damage: Worn threads reduce holding strength and should be replaced.
- Apply Thread-Locking Compounds If Needed: Use these on high-vibration areas to prevent loosening over time.
- Document Inspection Intervals: Keeping a record helps track trends and prevents recurring issues.
Neglecting loose bolts leads to long-term damage and costly repairs. A simple tightening routine improves machine reliability and reduces downtime.
10. Inspect Electrical Components
Electrical issues can bring a CNC machine to a complete halt. I’ve seen production lines shut down because of a single loose wire or a failing circuit board. These problems are avoidable with regular inspections.
Checking electrical components helps prevent unexpected failures, reduces downtime, and keeps machines running at peak performance.
Warning Signs of Electrical Failures
- Intermittent Power Loss: Machines shutting down or restarting unexpectedly could indicate faulty wiring or a failing power supply.
- Burnt or Overheated Components: Discoloration or burnt smells around electrical panels suggest overheating or short circuits.
- Erratic Machine Behavior: Sudden speed changes, inaccurate positioning, or unresponsive controls often point to electrical issues.
- Unusual Buzzing or Humming Sounds: These noises can indicate loose connections or failing relays.
- Frequent Tripped Breakers or Blown Fuses: Overloading or faulty components may be drawing excess current.
How to Spot Burnt or Loose Wires
- Inspect Wiring Connections: Loose terminals can cause arcing, leading to further damage.
- Check for Melted Insulation: Heat damage weakens wires and increases the risk of failure.
- Look for Corrosion on Connectors: Moisture and contamination can degrade electrical contacts.
- Use a Thermal Imaging Tool If Available: Hotspots indicate areas where electrical resistance is too high.
- Test Continuity with a Multimeter: This helps identify breaks in wiring that aren’t visible.
Preventative Steps to Avoid Electrical Breakdowns
- Tighten All Electrical Connections: Loose terminals create resistance, leading to overheating.
- Keep Control Panels Clean and Dry: Dust and moisture increase the risk of short circuits.
- Replace Worn-Out or Damaged Cables: Frayed wiring can lead to unpredictable failures.
- Check Grounding Connections: Poor grounding can cause erratic machine performance.
- Schedule Periodic Inspections: Regular electrical checks prevent minor issues from turning into major failures.
Electrical failures are costly and disruptive, but routine inspections keep CNC machines running safely and efficiently. Investing time in preventive maintenance reduces long-term risks and ensures stable operation.
Conclusion
That vibration I ignored? It taught me the cost of neglect. Now you have the checklist I wish I had then.
We’ve covered what to check, where to look, and how often. This routine works. It helped me avoid breakdowns, missed deadlines, and lost money.
Don’t wait until something fails.
Start now. Build your own habit of prevention.
Need machines built for long-term reliability?
Blue Elephant delivers CNC machines that last. Contact us today and let’s get your workshop set up for success!
Explore More Helpful Resources
For more in-depth knowledge, take a look at these recommended reads. We think you’ll find them useful:
Still haven’t found what you’re looking for? Don’t hesitate to contact us. We’re available around the clock to assist you.