I remember the excitement of setting up my first CNC router. I had the design ready, the machine powered on, and the material clamped down.
But when I pressed start, things didn’t go as planned. The bit dug too deep. The spindle stalled. And by the time I stopped the machine, my workpiece was destroyed.
I thought CNC routers were supposed to make cutting easy. What I didn’t realize was that knowing how to run one the right way takes more than just pressing a button.
Over the years, I’ve worked through every mistake—misaligned toolpaths, incorrect feeds and speeds, bad material hold-downs.
Now, I know what works. And in this guide, I’ll share exactly what you need to do to avoid the same frustration I went through.
Here’s what you’ll learn:
- The right way to set up your machine is so it runs smoothly.
- How to load files, generate toolpaths, and get clean cuts.
- The key safety steps to protect yourself and your machine.
If you want accurate, efficient, and safe machining, this guide will give you the steps to get there.
So let’s begin!
1. Understanding CNC Routers
I remember looking at my first CNC router and thinking, “This machine can do everything.” The idea of cutting, carving, and shaping materials with pinpoint accuracy felt like magic. But as I quickly learned, understanding how a CNC router works is the first step to using it properly.
What is a CNC Router?
A CNC router is a machine that cuts, engraves, and shapes materials using a rotating cutting tool. Instead of guiding the tool by hand, a computer controls the movement, following a programmed design.
Think of it like a printer, but instead of ink, it uses a cutting tool to remove material.
What Can a CNC Router Do?
- Cut wood, plastic, metal, and foam with precision.
- Engrave logos, designs, and text into materials.
- Create complex 3D carvings and detailed patterns.
- Drill holes and shape edges for furniture or molds.
How is a CNC Router Different from Other Machines?
There are many CNC machines, but each works differently:
- Laser Cutters use a focused laser beam to burn or melt material instead of a cutting tool.
- CNC Mills are heavier and built for cutting metals with more force. They remove material in layers instead of carving like a router.
CNC routers are faster than mills and more versatile than lasers when working with wood, acrylic, or soft metals.
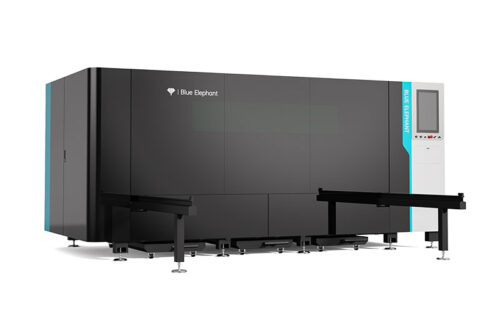
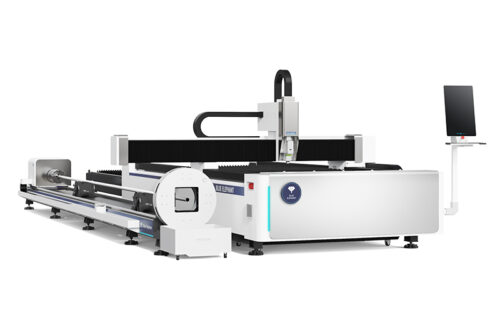
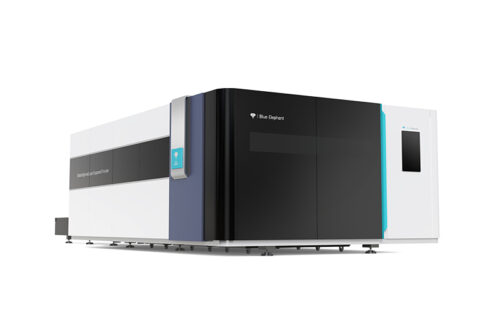
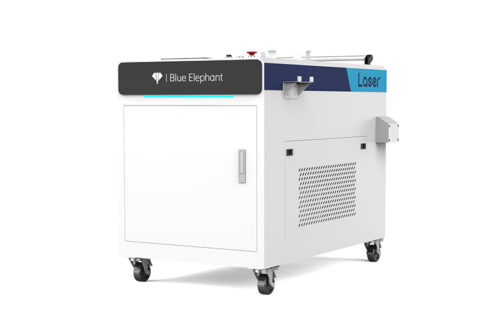
Choosing the right machine depends on your materials and production needs. With Blue Elephant, you get high-performance CNC solutions designed to fit your business.
Key Components of a CNC Router
A CNC router has several important parts. Each one plays a role in precision, speed, and quality.
Spindle and Cutting Tools
The spindle is the motor that spins the cutting tool. Different bits are used depending on the job:
- End Mills: Good for straight cuts and pockets.
- Ball Nose Bits: Used for smooth, curved surfaces.
- V-Bits: Great for engraving fine details.
Using the wrong tool can lead to rough cuts, broken bits, or wasted materials. I learned this the hard way when I snapped my first bit by running it too fast on hardwood.
Worktable and Material Holding
The worktable holds the material in place. A secure setup is the difference between a perfect cut and a ruined piece.
- T-Slot Tables use clamps to lock materials in place.
- Vacuum Tables use suction to hold flat materials without clamps.
If your material moves even slightly, your entire cut will be off.
Motion Control System
This controls how the router moves.
- Stepper Motors: Simple and affordable, but not as precise.
- Servo Motors: More accurate, used in high-end machines.
The motors move the spindle in three directions: X (left to right), Y (front to back), and Z (up and down).
Controller and Software
The controller is the brain of the CNC router. It reads G-code (a type of programming language) and tells the machine where and how to cut.
Most CNC routers work with software like:
- VCarve: Great for woodworking projects.
- Fusion 360: Used for detailed 3D modeling.
- GRBL or Mach3: Common for running DIY CNC machines.
Without the right software, a CNC router is just an expensive paperweight.
2. Setting Up Your CNC Router
A CNC router might look ready to go straight out of the box, but skipping the setup process leads to trouble. I learned this when a misaligned gantry ruined an entire sheet of plywood. The cuts were off, the edges weren’t clean, and I had to start over. That’s when I realized: if the machine isn’t set up correctly, every job will be a problem.
Taking the time to properly install, calibrate, and choose the right tools will save you materials, time, and frustration.
Installation and Assembly
Before powering the machine, you need a solid foundation. A shaky worktable or bad wiring can cause serious issues.
Unpacking and Positioning the Machine
- Set the CNC router on a flat, stable surface to prevent vibration.
- Leave enough space around it for material loading and maintenance.
- Keep dust and debris away from moving parts—dust buildup affects precision.
I once tried running a CNC on an uneven table, thinking it wouldn’t make a difference. The vibration caused the spindle to shift mid-job, leaving jagged edges. Lesson learned.
Connecting Power and Checking Voltage
- Check the voltage requirement in the manual—some machines need 220V.
- Plug into a dedicated outlet to avoid power fluctuations.
- Use a surge protector to prevent electrical damage.
Installing the Spindle and Cutting Tool
- Mount the spindle securely any looseness affects cut accuracy.
- Insert the router bit into the collet and tighten it firmly (but don’t overtighten).
- Run a test spin before cutting to check for unusual sounds or wobbling.
Calibrating and Squaring the Machine
Precision starts with proper calibration. Even small misalignments lead to uneven cuts.
Leveling the Worktable
- Use a level tool to check if the table is even. Adjust as needed.
- If your CNC has a spoilboard, surface it with a fly cutter for accuracy.
Checking and Adjusting the Gantry
- Measure both sides of the gantry from the worktable. Adjust if uneven.
- Move the spindle across the X and Y axis and watch for resistance.
I once ran a job without checking the gantry. The result? A slanted design instead of a straight cut. It only took a few minutes to fix, but it could have saved me an entire workpiece.
Setting Up Limit Switches and Homing
- Limit switches stop the machine from overextending. Double-check placement.
- Home the machine to set a consistent starting position for every job.
- Run a test move to confirm everything operates correctly.
Choosing the Right Cutting Tool
The wrong bit can ruin a project. I once used an upcut bit for MDF, thinking it wouldn’t matter. The chipping was awful. Choosing the right tool makes all the difference.
Different Router Bits and Their Uses
- End Mills: Clean straight cuts and pocketing.
- Ball Nose Bits: Great for 3D carving and smooth curves.
- V-Bits: Best for engraving fine details.
- Compression Bits: Ideal for plywood to prevent splintering.
Best Bits for Different Materials
- Wood: Upcut or compression bits for smooth edges.
- Acrylic: Single-flute end mills to avoid melting.
- Aluminum: Two-flute carbide bits for better chip removal.
- MDF: Straight or compression bits to reduce chipping.
Setting up a CNC router isn’t just about assembly—it’s about precision. A solid setup ensures smooth operation, clean cuts, and fewer mistakes.

3. Preparing a CNC Job: From Design to Execution
A CNC router doesn’t think for itself. It follows instructions. If those instructions aren’t right, the machine will cut in the wrong place, move too fast, or carve where it shouldn’t. I’ve had jobs ruined because I skipped a step, used the wrong settings, or forgot to secure the material properly. Every mistake costs me time and material.
To get clean, accurate cuts, you need a solid process—from design to execution.
Creating or Importing a Design File
Every CNC job starts with a design. If the design isn’t correct, the final cut won’t be either.
Choosing the Right Software
CAD (Computer-Aided Design) software helps create designs that a CNC machine can read. Some of the most popular options include:
- Fusion 360: Great for detailed 3D modeling.
- AutoCAD: Best for precise 2D technical drawings.
- VCarve: Ideal for woodworking and engraving projects.
If you already have an image or a drawing, you may need to convert it into a vector file before the CNC can read it. Vector files use clean lines instead of pixels, making them ideal for cutting.
Common File Formats for CNC Routers
- SVG or DXF: Used for 2D designs and cutting outlines.
- G-code: The actual instructions that tell the machine where and how to move.
Once the design is ready, it’s time to generate toolpaths.
Generating Toolpaths in CAM Software
A design on the screen doesn’t mean much until the machine knows how to cut it. This is where CAM (Computer-Aided Manufacturing) software comes in.
Choosing the Right Cutting Strategy
Different jobs require different cutting strategies:
- Pocketing: Removes material inside a shape (for inlays or recesses).
- Profiling: Cuts along the edges of a shape (for outlines or cutouts).
- Engraving: Carves fine details into the material.
Setting Feed Rate and Spindle Speed
Each material requires different settings:
- Softwoods: Higher feed rate, moderate spindle speed.
- Hardwoods: Slower feed rate to prevent burning.
- Plastics: Too fast and it melts, too slow and it chips.
- Metals: Requires slow feed rates and the right lubrication.
Simulating Toolpaths Before Cutting
This step is often skipped, but I’ve learned it saves time. Most CAM software allows you to preview the toolpath before cutting. It shows how the machine will move and helps catch mistakes before they happen.
Zeroing the Machine and Workpiece Setup
Even the best design won’t help if the material shifts mid-cut. Proper setup prevents misalignment and wasted material.
Setting the Home Position (XYZ Zeroing)
Zeroing tells the CNC where the job starts.
- Use a manual probe to align the tool to the material surface.
- A touch plate can help set the Z-axis automatically for precise depth control.
If the machine isn’t zeroed correctly, cuts will be off, ruining the entire job.
Securing the Material
A loose workpiece can shift, throwing off the whole design. There are several ways to secure it:
- Clamps: Great for larger materials but must be placed outside the cut path.
- Double-Sided Tape: Works well for small, thin materials.
- Vacuum Hold-Down: Ideal for large sheets, holding them in place with suction.
Using the wrong hold-down method can cause vibration, leading to rough edges or tool breakage.
Preparing a CNC job is about details and precision. Small mistakes in design, toolpaths, or setup lead to bad cuts and wasted material. Taking the time to plan, simulate, and secure everything properly will give you clean, accurate results every time.

4. Running the CNC Router Safely and Efficiently
A CNC router can feel like a hands-free tool, but it’s never a “set it and forget it” machine. I learned this early on when I walked away from my mid-job, only to return to a ruined workpiece. The bit had dulled, the material had shifted, and I had wasted both time and money.
Watching the machine, listening to issues, and making small adjustments are all part of running a CNC router properly. That’s why Blue Elephant CNC routers are designed for stability and precision, helping reduce errors and ensuring smoother operations—even on long production runs. A reliable machine makes all the difference.
Starting the Job: Step-by-Step Guide
A solid start makes all the difference. Miss a step, and you might end up ruining your material or worse, damaging the machine.
Step#1 Load the G-code File into the CNC Control Software
- Open your CNC software (Mach3, GRBL, or DSP controller).
- Load the correct G-code file. Double-check that the file matches your material size and tool setup.
Step#2 Check the Toolpath Preview
- Most software lets you simulate the cut before running it.
- Look for unexpected movements, deep cuts, or missing sections.
- If something looks off, go back and adjust your toolpath before starting.
Step#3 Start the Spindle and Adjust Speed
- Manually start the spindle or let the machine handle it (if automated).
- Gradually bring it up to speed. Jumping straight to full RPM can cause strain on the tool.
Step#4 Monitor the Cutting Process
- Stay near the machine while it runs.
- Listen to grinding, squealing, or rattling sounds—they signal tool or feed issues.
- Watch for material shifting, excessive dust, or smoke—all signs of incorrect settings.
Common Problems and How to Fix Them
Even with a perfect setup, things can go wrong mid-job. Here’s how to fix common issues.
Rough Edges or Chipping
- Possible cause: Feed rate too high or bit too dull.
- How to Fix:
- Slow down the feed rate for cleaner cuts.
- Switch to a sharper or higher-quality bit.
- Use compression bits for plywood to prevent splintering.
Material Burning
- Possible cause: Spindle speed too high or feed rate too slow.
- How to Fix:
- Lower the spindle speed and increase the feed rate.
- Use coolant or air assist for materials like acrylic and aluminum.
- Check for dull bits—burning happens when a bit loses its edge.
Machine Skipping Steps
- Possible cause: Loose belts, incorrect motor tuning, or too aggressive cut settings.
- How to Fix:
- Tighten belts and check motor tuning settings.
- Reduce the depth of cut per pass to ease strain on the machine.
- Lubricate the rails and check for dust buildup affecting movement.
Depth Inconsistencies
- Possible cause: Unleveled spoilboard or incorrect Z-zeroing.
- How to Fix:
- Resurface the spoilboard to ensure even cuts.
- Double-check Z-zero settings before each job.
- Use a touch plate or manual probe to get precise height calibration.
Running a CNC router takes more than pressing start. It’s about control, observation, and small adjustments that lead to perfect cuts.
By following the right steps and knowing how to troubleshoot common problems, you’ll get accurate, smooth results every time.
5. Safety Precautions When Using a CNC Router
I’ve made plenty of mistakes with CNC routers, but the worst ones involved ignoring safety rules. Once, I skipped wearing safety glasses because I thought a quick cut wouldn’t be a problem. A tiny wood chip shot straight at my eye. That was the last time I worked without eye protection.
CNC routers are powerful machines. Used correctly, they’re safe. Used carelessly, they can cause serious injuries. Following these safety steps will keep you protected and help avoid unnecessary risks.
Protective Gear and Workspace Setup
The right gear and a well-organized space make a big difference.
Wear Protective Equipment
- Safety glasses: Flying debris is common, even with enclosed machines.
- Ear protection: CNC routers are loud. Prolonged exposure damages hearing.
- Dust mask or respirator: Cutting wood, MDF, or plastics creates fine dust that’s harmful to breathe.
It only takes one accident to realize why these things matter. Wearing safety gear is easier than dealing with an injury.
Keep Your Workspace Safe
- Good ventilation is essential. Fine dust from cutting builds up fast. A dust extraction system or shop vacuum keeps the air clean.
- Cables should be secured. Loose wires on the floor create tripping hazards.
- Keep a fire extinguisher nearby. It’s rare, but friction and heat from cutting certain materials can cause sparks.
A clean, organized workspace isn’t just about efficiency—it’s about safety.
Machine-Specific Safety Tips
CNC routers don’t just cut materials. They spin sharp bits at thousands of RPM. That’s why these safety habits matter.
Keep Hands Away from Moving Parts
- Never reach near the spindle while it’s running.
- Use a brush or vacuum to clear dust instead of your hands.
I once saw someone try to remove a small offcut while the spindle was still moving. The bit caught it and flung it across the shop. A simple wait of a few seconds would have prevented that.
Use the Emergency Stop Button When Necessary
- Every CNC router has an E-stop button—know where it is before starting a job.
- If something looks wrong (smoke, bad noises, material shifting), stop immediately.
It’s tempting to let a job finish even if something seems off. But stopping early is better than ruining the workpiece—or the machine.
Power Off Before Tool Changes and Maintenance
- Always shut down the machine before swapping out bits.
- Disconnect power before making adjustments inside the control panel.
It sounds obvious, but when you’re in a rush, it’s easy to forget. A machine that looks “off” may still have power running through it. Taking a second to double-check is always worth it.
A CNC router is a powerful tool, but it’s not forgiving when safety is ignored. Taking a few extra steps—wearing gear, securing cables, keeping hands clear—can prevent injuries and machine damage.
6. Maintaining and Troubleshooting Your CNC Router
A CNC router is like any other machine, it needs regular care to stay in top shape. Ignore maintenance, and you’ll notice rough cuts, slipping belts, or even a sudden shutdown mid-job. I’ve seen CNC routers that were barely a year old break down simply because they were never cleaned or checked.
Taking a little time for maintenance prevents costly repairs and keeps your machine running smoothly.
Routine Maintenance Checklist
A clean and well-maintained machine runs better and lasts longer. Here’s what you should do regularly:
After Every Job:
- Remove dust and debris. A simple vacuum or air blast prevents buildup that can affect precision.
- Inspect the cutting area. Small offcuts can get lodged in tight spaces.
Weekly Checks:
- Lubricate linear rails and ball screws. Dry or sticky rails cause uneven movement.
- Tighten belts and pulleys. Loose belts lead to skipped steps and inaccurate cuts.
- Check all screws and bolts. Vibrations can loosen them over time.
Monthly Maintenance:
- Resurface the spoilboard. Cutting into an uneven surface leads to depth inconsistencies.
- Test homing and limit switches. Misalignment can throw off every job.
Skipping these steps might not cause problems right away, but small issues build up fast.
Replacing Worn-out Parts
Some parts wear down over time. Knowing when to replace them saves time and money.
Router Bits and Collets
- Dull bits cause rough cuts. If you notice burning or excessive chipping, swap them out.
- Collets should be replaced every few months. A worn collet won’t hold bits tightly, causing wobble.
Spindle Bearings
- A high-pitched whining noise is a bad sign. It means the bearings are wearing out.
- If there’s excessive vibration, check the spindle. Replacing bearings early prevents bigger issues.
A good rule of thumb: If your cuts are getting worse, check your tools first.
Software and Hardware Troubleshooting
Sometimes, the machine itself is fine—but the software or electronics cause issues.
Lost Connection Between CNC Software and Machine
- Check USB or Ethernet cables. Loose connections cause random stops.
- Restart the control software. Some programs freeze if left running too long.
Updating Firmware and Driver Settings
- Firmware updates fix bugs and improve performance. Check your machine’s manufacturer website for the latest version.
- Old drivers can cause lag or miscommunication. Updating them helps prevent unexpected behavior.
A CNC router is part hardware, part software. Keeping both in check ensures reliable performance.
A CNC router is like any machine, it needs care to perform well. Regular cleaning, lubrication, and part replacements keep it running like new. Catching small issues before they become big ones saves time, frustration, and money.
7. Advanced Tips for Optimizing CNC Router Performance
Getting a CNC router to work is one thing. Getting it to work efficiently and produce flawless cuts? That’s another challenge. I’ve had jobs that took twice as long as they should have. Other times, I had to redo cuts because of burn marks or rough edges. Fine-tuning your machine saves time, reduces material waste, and improves overall quality.
Here’s how to get the most out of your CNC router.
Improving Cut Quality and Efficiency
Even small changes in settings can make a big difference in how a CNC router performs.
Choosing Optimal Feed and Speed Settings
- Go too slow, and the bit rubs instead of cutting—causing burn marks.
- Go too fast, and the machine struggles—leading to rough edges.
- The goal is balance—adjust feed rate and spindle speed based on material:
- Wood: Moderate feed rate, mid-to-high spindle speed.
- Acrylic: Faster feed rate, lower spindle speed to prevent melting.
- Metal: Slow feed rate, high spindle speed, plus lubricant if needed.
A good way to test? Run a small sample cut before committing to a full job.
Using Multiple Passes for Cleaner Cuts
- Cutting deep in one pass strains the bit and motor.
- Instead, use multiple shallow passes to ease the load and get smoother edges.
- For harder materials like aluminum, take extra-light passes to avoid tool damage.
I once tried to cut ¾-inch plywood in a single pass to save time. It ruined the bit and left splintered edges. Taking two passes would have saved both the tool and the material.
Climb Milling vs. Conventional Milling
- Climb milling (cutting with the tool moving in the same direction as the material feed) results in smoother finishes but puts more strain on the machine.
- Conventional milling (cutting against the feed direction) is better for roughing but leaves slightly rougher edges.
For softer materials like wood, climbing milling is usually best. For metals, conventional milling offers more control.
Expanding Your CNC Capabilities
A CNC router can do more than just cut flat sheets. With the right upgrades, you can tackle more complex projects.
Using a Rotary Axis for 3D Carving
- A rotary axis turns the material while cutting, allowing for cylindrical or 3D designs.
- Perfect for making table legs, statues, or intricate moldings.
Upgrading to an Automatic Tool Changer (ATC)
- If you frequently switch between bits, an ATC speeds up production by changing tools automatically.
- This is especially useful for jobs requiring multiple tool types in one project.
Working with Composite Materials and Metals
- Composite materials (carbon fiber, fiberglass) require special bits and dust collection.
- Aluminum and brass can be cut with a CNC router but need high-speed spindles and lubricant to avoid overheating.
Adding these capabilities turns a standard CNC router into a more powerful production tool.
CNC routers are already precise, but small optimizations make them even better. Adjusting feed rates, using multiple passes, and upgrading your machine can boost efficiency and expand what you can create.

Conclusion
Think back to the last time something went wrong with your CNC router. Maybe a rough edge. Maybe a missed step. Maybe a ruined workpiece.
Now, you know how to prevent those mistakes before they happen.
You have the tools, the techniques, and the understanding to make every cut clean, precise, and efficient. But knowledge means nothing without action.
So what’s your next move? Are you going to test your settings, upgrade your machine, or finally start that big project?
Whatever it is, start now. And if you need help, contact us today!
Learn More: Recommended Reads
If you’re looking for more insights, we’ve put together a list of helpful articles that you might enjoy:
Still haven’t found what you’re looking for? Don’t hesitate to contact us. We’re available around the clock to assist you.