I remember the first time a laser cutting machine broke down in the middle of a big order. The frustration, the lost time, and the unexpected repair costs were a nightmare. That day, I learned a painful lesson: maintenance isn’t optional; it’s necessary.
If you rely on laser cutters for your business, you can’t afford sudden breakdowns. A well-maintained machine runs smoother, cuts cleaner, and lasts longer.
Over the years, I’ve worked with machine dealers, repair specialists, and rental companies to understand what keeps these machines in top shape.
This guide is built on real-world insights, not just theory.
In this article, you’ll find 9 crucial maintenance checks that prevent costly repairs and keep your machine running at peak performance. Whether you sell, rent, or service laser cutters, this checklist will help you maximize efficiency and profits.
So, let’s dive in!
1. Check and Clean the Optics
I’ve seen it happen too many times, a laser cutter that should be slicing through materials like butter suddenly starts struggling. The cuts aren’t as sharp, the edges look burned, and the power just seems off.
9 times out of 10? Dirty optics are to blame.
Your laser’s lenses and mirrors are what make precision cutting possible. If they’re covered in dust, residue, or fingerprints, your machine is working harder than it should. That means wasted energy, poor results, and expensive wear on your laser source.
Importance
- Maximum Cutting Power: Dirt and debris block the laser beam, reducing power and efficiency.
- Sharper, More Precise Cuts: Clean optics ensure smooth, accurate cutting without burn marks.
- Longer Lifespan for Your Laser Source: A dirty lens forces the machine to work harder, leading to premature wear.
- Lower Risk of Costly Repairs: Damaged or neglected optics can crack or burn, leading to expensive replacements.
How to Clean Your Laser Optics
- Power Down the Machine: Never attempt to clean optics while the laser is active.
- Use a Lint-Free Cloth or Optical Swabs: Regular cloths or paper towels leave behind fibers that can cause damage.
- Apply an Approved Lens Cleaner: Stick to isopropyl alcohol (99%) or an optics-safe solution—never use household cleaners.
- Gently Wipe in a Circular Motion: Let the cleaning solution lift the dirt—don’t rub aggressively.
- Inspect for Scratches or Damage: If you see chips or cracks, replace the lens immediately. A damaged lens can ruin your machine’s performance.
When to Clean
Daily. If your machine runs multiple shifts, clean the optics at the start of each one. If you’re cutting materials like acrylic or wood—which produce heavy residue—you may need to clean them multiple times per shift.
Skipping this step isn’t just bad maintenance—it’s bad business. A dirty lens leads to weaker cuts, wasted materials, and costly breakdowns. Keep them clean, and your laser cutter will deliver peak performance every time.
2. Maintain the Laser Nozzle
Your laser nozzle controls the precision of your cuts by directing airflow and assisting with material removal. If it’s dirty, clogged, or damaged, your machine will struggle—leading to poor-quality cuts, wasted materials, and frustrated customers.
Importance
- Ensures Smooth, Consistent Airflow: A clogged nozzle disrupts airflow, leading to burn marks and uneven cuts.
- Prevents Material Buildup: Over time, melted residue can collect inside the nozzle, affecting cutting quality.
- Reduces Risk of Overheating: A blocked nozzle can cause excessive heat buildup, which may damage the laser head.
- Improves Cutting Precision: A properly maintained nozzle ensures cleaner, sharper, and more accurate cuts.
How to Clean Your Laser Nozzle
- Turn Off the Machine: Always power down before handling the nozzle to prevent accidents.
- Remove the Nozzle Carefully: Unscrew or detach it according to your machine’s manual. Avoid using excessive force.
- Check for Buildup or Clogs: Look inside the nozzle for any debris, dust, or melted material.
- Use Compressed Air to Clear Debris: Blow out any dust or small particles stuck inside.
- Clean with a Fine Needle if Needed: For stubborn buildup, gently insert a thin needle to clear out blockages.
- Wipe the Nozzle Exterior: Use a lint-free cloth with isopropyl alcohol to remove any residue on the outer surface.
- Inspect for Damage: If the nozzle is bent, warped, or excessively worn, replace it immediately.
When to Maintain
Daily. Before starting any production, inspect and clean the nozzle to prevent buildup. If you cut thick or dirty materials like wood or acrylic, check and clean it multiple times a shift.
A dirty or damaged nozzle can throw off an entire production run. But keeping it clean? That ensures flawless, high-precision cuts, every time.

3. Keep the Cooling System Clean and Functioning
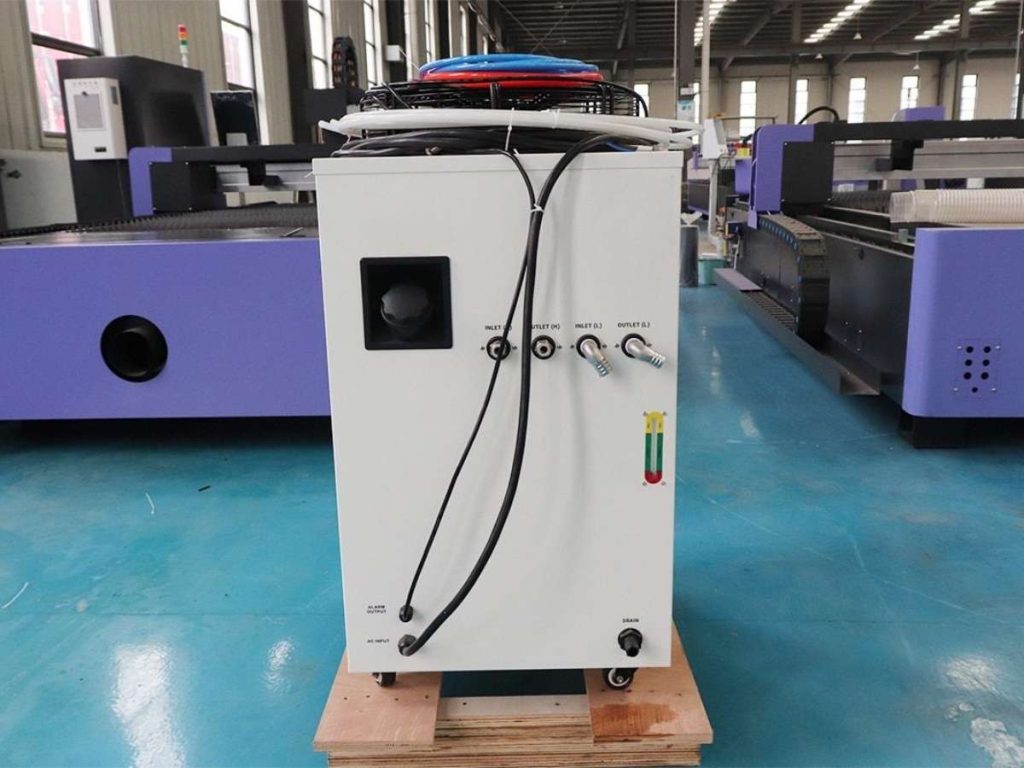
Your laser cutting machine generates intense heat, and without a properly functioning cooling system, it won’t last long. Overheating can cause serious damage to the laser source, lenses, and internal components—leading to costly repairs or even total machine failure.
A clean, well-maintained cooling system keeps everything running at the correct temperature, ensuring maximum efficiency and longevity.
Importance
- Prevents Overheating: Keeps the laser source and other critical components from reaching damaging temperatures.
- Improves Cutting Performance: A stable temperature ensures consistent laser power and cutting quality.
- Extends Machine Lifespan: Reduces wear and tear on internal parts, avoiding premature failures.
- Minimizes Downtime and Repairs: Prevents unexpected shutdowns that disrupt operations and increase maintenance costs.
How to Maintain Laser Cutter’s Cooling System
- Check Coolant Levels Regularly: Keep the reservoir filled with the manufacturer-recommended coolant. Low levels can cause overheating.
- Replace Coolant Periodically: Change the coolant every 2-3 months or as recommended to prevent contamination and mineral buildup.
- Monitor for Leaks: Inspect hoses and connections for any signs of leakage that could lead to system failure.
- Clean Cooling Fans and Radiators: Dust and debris buildup can block airflow—use compressed air to keep them clean.
- Ensure Proper Water Flow in Chillers: If your system uses a water chiller, make sure the pump is functioning correctly and the water is circulating efficiently.
- Use Distilled Water if Required: Hard water can cause mineral deposits that reduce cooling efficiency. Always follow the manufacturer’s recommendations.
How Often?
Weekly. Check coolant levels and look for leaks at least once a week. Deep clean and replace coolant every 2-3 months. If your machine runs continuously or in a high-dust environment, you may need to check it more frequently.
Neglecting the cooling system can lead to overheating, power fluctuations, and laser degradation. Stay proactive, and your machine will operate at peak performance without unexpected failures.
4. Inspect and Replace Air Filters
I once visited a machine rental company that was struggling with constant overheating and poor cutting quality. Their laser cutter, which was only a year old, was performing like a worn-out machine. When I checked the system, the issue was obvious—the air filters were completely clogged with dust and debris.
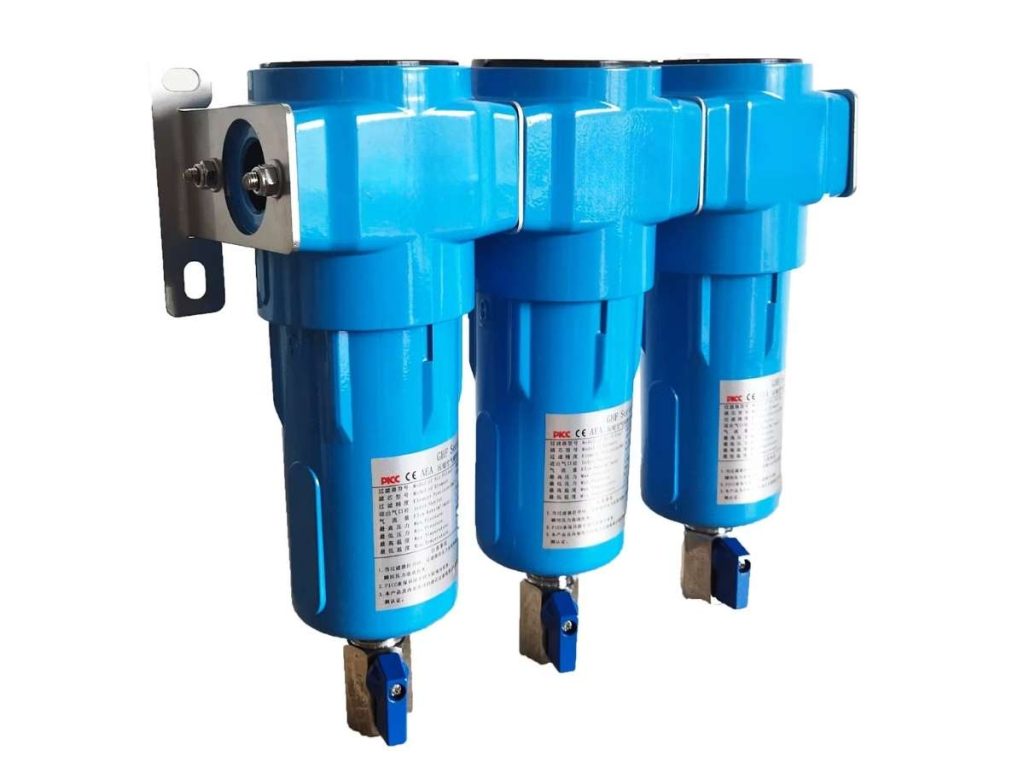
Your laser cutter relies on clean, unrestricted airflow to function efficiently. When the air filters are clogged, dust, smoke, and contaminants get trapped inside the system—leading to overheating, poor-quality cuts, and potential damage to internal components.
Importance
- Ensures Proper Ventilation: Keeps air flowing smoothly through the system, preventing overheating.
- Protects Internal Components: Reduces dust buildup on sensitive parts like optics and circuit boards.
- Improves Laser Performance: Clean air assists in achieving precise, consistent cuts.
- Reduces Machine Downtime: Prevents airflow-related failures that can bring operations to a halt.
How to Inspect and Replace Air Filters
- Turn Off the Machine: Always power down before handling the air filters.
- Locate the Air Filters: Check your machine’s manual for the exact filter locations. Most machines have filters near the exhaust system and cooling vents.
- Remove and Inspect for Buildup: If the filters appear dusty, gray, or clogged, they need cleaning or replacement.
- Clean or Replace Filters as Needed: If reusable, clean them with compressed air or wash them (if recommended by the manufacturer). If disposable, replace them with new filters.
- Check for Blockages in the Ventilation System: Even with clean filters, obstructed vents can restrict airflow. Ensure nothing is blocking the exhaust.
How Often?
Weekly. Check your filters once a week, especially if your machine is used frequently. If your laser cutter operates in a dusty environment or cuts materials like wood and acrylic that produce residue, inspect and clean them more often.
Replace filters as soon as they show signs of clogging.
Neglecting air filters can lead to a slow, inefficient, and overheating machine. Keep them clean, and your laser cutter will run cooler, cleaner, and more efficiently.
5. Align and Calibrate the Laser Beam
If your laser cutter isn’t cutting as precisely as it should, beam misalignment is likely the problem. Even a slight misalignment can cause uneven cuts, wasted material, and excessive wear on the machine. A properly aligned laser ensures maximum cutting accuracy and efficiency.
Importance
- Ensures Consistent Cutting Precision: A misaligned beam causes uneven edges and poor-quality cuts.
- Prevents Excessive Wear on Optics: Misalignment forces the beam to hit mirrors and lenses at incorrect angles, leading to damage over time.
- Maximizes Laser Power Efficiency: A well-aligned beam delivers full power to the cutting surface without energy loss.
- Reduces Material Waste: Proper calibration prevents costly errors and rework.
How to Align and Calibrate the Laser Beam
- Power Down the Machine: Always turn off the laser before making adjustments.
- Check Mirror Positions: Inspect all mirrors to ensure they are correctly positioned and free from dust or damage.
- Perform a Test Burn on Scrap Material: Fire the laser at low power on a test piece to see if the beam is centered.
- Adjust Mirror Screws as Needed: Use the fine-tuning screws on each mirror mount to center the beam.
- Verify Beam Alignment at Multiple Points: Test at different positions along the cutting bed to ensure uniform alignment.
- Use an Alignment Tool if Available: Some laser cutters come with built-in alignment tools or software to simplify calibration.
How Often?
Monthly. Regularly check and align the laser beam to maintain consistent accuracy. If you notice declining cut quality, perform an alignment check immediately. Machines that are frequently moved or used for high-precision tasks may require more frequent calibration.
Skipping alignment checks can result in inconsistent performance and expensive component damage. Keep your laser cutter properly aligned, and it will deliver precise, high-quality cuts every time.
6. Lubricating Moving Parts
I once worked with a machine dealer who couldn’t figure out why his laser cutter was making a grinding noise. At first, he thought it was an issue with the motor, but after checking, we found the completely dried-out guide rails and bearings.
Your laser cutter’s moving parts—rails, bearings, and ball screws—are under constant stress. Without proper lubrication, they wear down quickly, leading to rough motion, loss of cutting accuracy, and even mechanical failure.
Importance
- Ensures Smooth, Precise Motion: Reduces friction, allowing the laser head to move freely and cut accurately.
- Prevents Wear and Tear: Protects against premature damage to rails, gears, and bearings.
- Reduces Stress on Motors: Well-lubricated components move effortlessly, preventing unnecessary strain on stepper motors.
- Extends Machine Lifespan: Keeps mechanical parts in top condition, delaying expensive replacements.
How to Lubricate Your Laser Cutter
- Turn Off and Unplug the Machine: Always ensure safety before applying lubricant.
- Clean the Rails and Bearings First: Remove dust and debris using a lint-free cloth or compressed air before applying lubricant.
- Use the Right Lubricant: Check your manufacturer’s recommendation—some machines require light machine oil, while others may need specialized grease. Avoid using WD-40, as it’s a cleaner, not a long-term lubricant.
- Apply a Thin, Even Coat: Too much lubricant can attract dust, leading to buildup over time. A small amount goes a long way.
- Manually Move the Gantry: After applying lubricant, move the laser head manually along the rails to distribute it evenly.
- Check for Excess Lubricant: Wipe away any excess to prevent drips onto other components.
How Often?
Every 2 weeks. If your machine operates in a dusty environment or runs long hours, you may need to lubricate weekly. Skipping lubrication leads to friction, vibration, and eventually, costly mechanical breakdowns.
A well-lubricated machine runs quietly, smoothly, and with pinpoint accuracy. Keep those moving parts in top shape, and your laser cutter will continue performing like new.
7. Check the Drive System
The drive system is the backbone of your laser cutter’s movement. It controls the motion of the laser head, ensuring precise positioning, smooth operation, and accurate cuts.
If any part of the system—belts, gears, pulleys, or motors—becomes loose, worn out, or misaligned, your machine’s performance will suffer. Regular inspections prevent breakdowns, minimize cutting errors, and extend the lifespan of key components.
Importance
- Ensures Smooth and Accurate Motion: Prevents jerky movements or misaligned cuts.
- Reduces Wear on Components: Identifies early signs of belt or gear degradation before they cause major failures.
- Prevents Slipping and Skipping: Loose belts or damaged gears can cause the laser head to shift unexpectedly.
- Maintains Cutting Precision: A well-maintained drive system ensures repeatable, high-accuracy cuts.
How to Maintain the Drive System
- Power Off the Machine Before Inspection: Always turn off the laser cutter before checking moving parts.
- Check Belts for Tension and Wear: Loose or frayed belts should be tightened or replaced. Belts should be firm but not overly tight.
- Inspect Gears and Pulleys for Damage: Look for cracks, missing teeth, or excessive wear. Lubricate metal gears if necessary.
- Test Stepper Motors and Servo Motors: Ensure they operate smoothly without overheating or unusual noises.
- Clean Any Dust or Debris: Use compressed air or a soft brush to remove buildup that could interfere with motion.
- Run a Test Cut After Adjustments: Make sure the laser moves precisely and doesn’t drift off track.
Types of Drive Systems
Different laser cutters use various drive systems to control movement and cutting accuracy. Understanding these systems helps in diagnosing issues and ensuring proper maintenance.
- Belt Drive System: Common in entry-level and mid-range laser cutters. Uses rubber or reinforced fiber belts to move the laser head.
- Advantages: Lightweight, fast, and relatively quiet.
- Maintenance Tip: Belts can stretch over time—regularly check for slack and tighten if needed.
- Lead Screw Drive System: Found in high-precision laser cutters that require fine control. Uses threaded rods (lead screws) to move components.
- Advantages: Excellent precision and minimal backlash.
- Maintenance Tip: Keep lead screws clean and well-lubricated to prevent binding.
- Rack and Pinion Drive System: Used in heavy-duty industrial laser cutters. Features a metal gear (pinion) that moves along a toothed rail (rack).
- Advantages: Handles high speeds and heavy loads with minimal wear.
- Maintenance Tip: Check for proper lubrication and ensure gears aren’t worn down.
- Linear Motor Drive System: Found in high-end, ultra-precise laser cutters. Uses direct-drive electromagnetic motors for movement.
- Advantages: Zero backlash, extreme precision, and high-speed capability.
- Maintenance Tip: Requires little maintenance but should be kept free of dust and electrical interference.
How Often?
Monthly. Inspect belts, gears, and motors at least once a month. If your machine is in heavy use, perform checks more frequently. Ignoring drive system maintenance can lead to skipped steps, misaligned cuts, and costly repairs.
By keeping the drive system in top shape, your laser cutter will operate smoothly, accurately, and without unexpected failures.
8. Maintain the Exhaust System
I once walked into a workshop where the air felt thick, almost suffocating. The operators were complaining about smoke buildup, and their laser cutter was struggling to maintain cutting speed.
When I checked their exhaust system, the problem was a clogged exhaust fan, coated in layers of dust and residue, was barely moving air.
Your laser cutter burns through material at high temperatures, creating smoke, fumes, and fine dust. Without a properly maintained exhaust system, those contaminants can damage machine components, lower cutting efficiency, and even pose health and fire risks.
Importance
- Removes Smoke and Fumes: Prevents buildup of harmful particles that can reduce air quality and damage optics.
- Prevents Overheating: Proper ventilation keeps the machine cool, preventing heat-related malfunctions.
- Improves Cutting Performance: A strong airflow helps remove debris from the cutting surface, ensuring cleaner cuts.
- Reduces Fire Hazards: Prevents flammable material buildup inside the machine.
How to Maintain Laser Cutter’s Exhaust System
- Inspect the Exhaust Fan Weekly: Make sure it’s spinning freely and not covered in dust or residue.
- Clean or Replace Air Ducts as Needed: Over time, ducts can clog with soot and debris—use a vacuum or compressed air to clear them.
- Check for Blockages in the Ventilation System: A clogged vent can trap fumes inside the machine, affecting cutting performance.
- Ensure Proper Airflow: Hold a piece of paper near the exhaust output. If the suction is weak, your system needs cleaning or adjustment.
- Replace Carbon Filters Regularly: If your system has air filters, replace them according to the manufacturer’s schedule to maintain efficiency.
- Inspect for Damage or Wear: Look for cracks, loose connections, or any signs of leaks in the exhaust tubing.
How Often?
Weekly. Check the exhaust system at least once a week to prevent buildup. If you cut materials like wood or acrylic—which produce heavy residue—inspect and clean it more frequently.
A weak or clogged exhaust system doesn’t just slow down production; it can put your business at risk. Stay ahead of maintenance, and your laser cutter will run cleaner, safer, and more efficiently.
9. Update and Backup Machine Software
Your laser cutting machine isn’t just a mechanical tool—it’s powered by software that controls precision, speed, and efficiency. Outdated or unoptimized software can lead to performance issues, inaccurate cuts, and even system crashes. Keeping your machine’s software updated ensures better functionality, improved security, and access to the latest features.
Importance
- Enhances Performance and Accuracy: Software updates often include bug fixes and optimizations that improve cutting precision.
- Ensures Compatibility with Newer File Formats: Updates allow seamless integration with the latest design software and file types.
- Improves Security and Stability: Prevents system vulnerabilities that could lead to data corruption or unexpected crashes.
- Saves Custom Machine Settings: A backup ensures you don’t lose calibration, speed settings, and job history after an update.
How to Update and Backup Your Machine Software
- Check for Manufacturer Updates: Visit the laser cutter manufacturer’s website or check built-in software notifications for the latest version.
- Back Up Machine Settings Before Updating: Save your custom configurations to a secure location to avoid losing important parameters.
- Use Only Official Software and Firmware: Avoid third-party updates that may not be compatible with your machine.
- Test the Update on a Small Job First: Run a test cut after updating to ensure everything functions correctly.
- Keep a Copy of the Previous Version: If an update causes unexpected issues, having a backup version allows you to revert easily.
How Often?
Quarterly. Check for updates every few months or whenever the manufacturer releases a new version. Regularly back up your settings, especially if you adjust parameters frequently.
Skipping software updates can lead to inefficiencies, cutting errors, and security risks. Keep your system updated and backed up, and your laser cutter will continue running at peak performance.
Conclusion
You’ve invested in your laser cutter—now it’s time to protect that investment. I’ve seen too many businesses struggle with machine failures that could have been prevented with simple maintenance.
But here’s the good news: you have the power to stop that from happening.
Think back to that overheating machine we talked about. A ten-minute coolant check could have saved that operator thousands of dollars.
So, ask yourself: are you staying ahead of maintenance, or just waiting for something to go wrong?
If you’re not sure, let’s talk.
Contact us today, and we’ll help you keep your laser cutter running at peak performance.
Recommended Reads for You
If you’re looking for more insights, we’ve put together a list of helpful articles that you might enjoy:
Still haven’t found what you’re looking for? Don’t hesitate to contact us. We’re available around the clock to assist you.


