As the application of CNC routers in large mechanical factories, DIY CNC wood machine has gradually gained popularity in small and home workshops. If you’ve decided to build your homemade CNC router or maybe you’re just considering it, where to start? What do you need to consider before DIY wood CNC machine? What types of DIY CNC router kits should you buy? If you are looking for the answers of these questions, this guide is for you. This guide may help you understand the considerations and steps when you DIY wood CNC machine.
Why DIY CNC router
There are many reasons that people want to DIY CNC router. As we know, there are plenty of types of CNC machines for different purposes, and some of them with multiple functions may be very expensive. So sometimes people want to DIY wood CNC machine just because they can’t afford to buy one off the shelf. In addition, if you are an owner of a small workshop or a hobbyist of handicrafts who enjoy making things with your hands, you may not need too complex functions of the CNC router, so you can choose DIY CNC router. There is also much flexibility when you design and build your homemade CNC router. You will be able to customize your CNC router to fit your special and unique requirements.
What can a DIY CNC router do
Just as the name implies, DIY CNC router means to build a CNC router by yourself according to your specific needs. Many small factory or workshop owners or hobbyists are inclined to DIY wood CNC machine by themselves to process their special products or handicrafts, such as relief sculptures, moulds, advertising signs, toys, etc., and many choose to build a DIY wood CNC machine to cut wooden or metallic plates to fabricate wood products and furniture, such as cabinets, wardrobes, musical instruments etc. Buying a ready-made CNC router may save many troubles, but at the same time, may cause wastes. Because the workshop owners or hobbyists may only use one or two functions of the CNC machine, or may require simple configuration, the additional functions of the CNC machine could cause a waste of money and resource. In addition, DIY CNC router may require relatively strong hands-on ability and certain knowledge concerning the CNC machine.
What to consider before DIY CNC router
But before starting to build your homemade CNC router, you’ll need to take several issues into consideration, including:
Purpose: What kind of DIY wood CNC machine you want to build? What do you want to make with this DIY wood CNC machine? These two questions will greatly affect your choice of specifications and material for your CNC machine.
Budget: How much can you afford to spend on this DIY CNC router? Some are more expensive than others and some may require more software or tooling than others, which causes additional expenses. For example, a small wood CNC engraving machine may cost as low as $200, while a large wood and aluminum CNC cutting machine could cost $600 or even more. Therefore, you’ll have to determine a budget that you are willing and afford to pay for the DIY CNC router.
Capability: Another important issue you need to consider is your capability to DIY wood CNC machine. You’ll have to make a realistic assessment of the your technical skills. Some CNC machine is more easier to build than others and some may accept looser tolerances. Besides, strong woodworking versus strong metalworking skills will affect your choices too.
Time: Given enough time, you can manage to build almost anything. But how much time can you actually devote to the DIY CNC router? There are a great deal of work to do in building your own CNC router, so the building process may take a long time than you think. Therefore, if you don’t have much time, you may only build a simple wood CNC machine, while if you get plenty of time, you may build a relatively more complex DIY wood CNC machine to better meet your needs.
After you have made you purpose clear, made a budget, understood your skills and determined your time schedule, you may start to DIY CNC router.
Advantages and disadvantages of DIY CNC router
Building your own CNC router has may advantages. First of all, it may realize the customizability. When you buy a CNC router, it may lack features you need, or make you pay extra for features that you don’t need. If you build one by yourself, you can make your own choice of what DIY CNC router kits to include and what not. Secondly, building your own CNC router can save a lot of money. Buying a ready-made CNC wood router often costs several hundreds even thousands of dollars, but DIY wood CNC machine can achieve the same result for a much lower cost. Thirdly, you can create awesome things. Whether you want to develop your own business, produce unusual parts or simply create unique handicrafts, you can build a CNC router with the DIY CNC router kits that you need to achieve your specific goals and you’ll obtain the sense of achievement from making things by yourself, both the CNC router and the things made by it.
On the other hand, DIY CNC router also has several disadvantages. For example, it takes much more time and workload to build a CNC router than simply buying one. You may have to choose and buy the DIY CNC router kits, whether mechanical or electrical parts, all by yourself. This may require you to refer to plenty of materials and compare the DIY CNC router kits of different brands and configurations, which cost plenty of time and energy. Moreover, DIY CNC router requires relatively strong DIY capability. So if you are not good at building things with your hands, building your own CNC router may seem a bit difficult for you.
What you’ll need in DIY CNC router
As you may have already guessed, there are a great deal of possibilities when it comes to build a router. However, the CNC router basically requires the following parts:
Mechanical parts, mainly including:
- Tools, such as cutting tools
- A frame
- Bearings, guides/rails
- Table, supports
- Spacers, washers, nuts, screws, bolts, etc.
Electronic parts, mainly including:
- Processor/control board (some machines may use a PC)
- Spindles
- Drivers, motors
- Inverters, fuse, circuit breaker,
- Computer, software
- Power supply
Knowing what type of CNC router you want to build may help you to choose the right parts. If you are still struggling to come to a decision in any respect of the DIY CNC router, you can contact Blue Elephant to help you out. Blue Elephant will give you the optimized solutions to help you build a CNC router.
Steps to DIY CNC router
1. Design
The rigidity of the your design is very important, and it will determine the cutting ability and the surface finish that the DIY CNC router creates. So if you have decided to make a CNC router by yourself, I bet there is a basic design scheme in you mind. In this step, you’ll have to decide several issues, including the overall dimension, the type of the router, whether table-moving or gantry-moving, the required cutting area, the machine size, tolerance requirements, materials and tools etc.
After determine the following issues, you may draw a design drawing for the DIY CNC router with the help of some CAD software. If you find something inappropriate during the course of building your own CNC router, you may have to come back to modify the design drawing. After you make a design drawing, it is time to buy the necessary DIY CNC router kits.

2. Construct the frame
The frame is what holds together all the other parts of your homemade CNC router. Therefore, it is the first part you’ll make when building your own CNC router. Metals are good choices for your frame, as they have good stability and rigidity. A well-shaped frame will, in turn, prolong the service life of the CNC router. The frame design of the DIY CNC router is also determined partially by the materials and supplies that you have, the number of ball screws, the guides, and motors your budget allow etc.

3.Install the gantry
A gantry allows the machining tool to move along the Y-axis of a CNC router, and it will hold the tool of your homemade CNC router in place above the workspace. A good gantry design is one of the most important factors for a DIY CNC router. In terms of the transmission method, you may choose ball screws or linear racks for the gantry based on your needs. Before installing the gantry, you’ll need to design the gantry to meet the force requirements that it will encounter. This will prevent excess stress and strain on such parts as bears, ball screw, motor and other DIY CNC router kits of the homemade CNC router.

4.Install Z axis assembly
Z-axis assembly mainly consists of a spindle and a tool. The spindle itself will be moving up and down along the Z-axis of your homemade CNC router. You may choose to connect a water or air cooling system and a dust system based on your needs and budget. The commonly-used brands of spindle includes Changsheng, Italy HSD etc. There are a wide variety of machining tool. Metal cutting tools are commonly used for many operations, but more elaborate machines may use laser or plasma cutting tools. You can choose the spindle and the tool according to your purpose and budget.
5.Install Y axis assembly
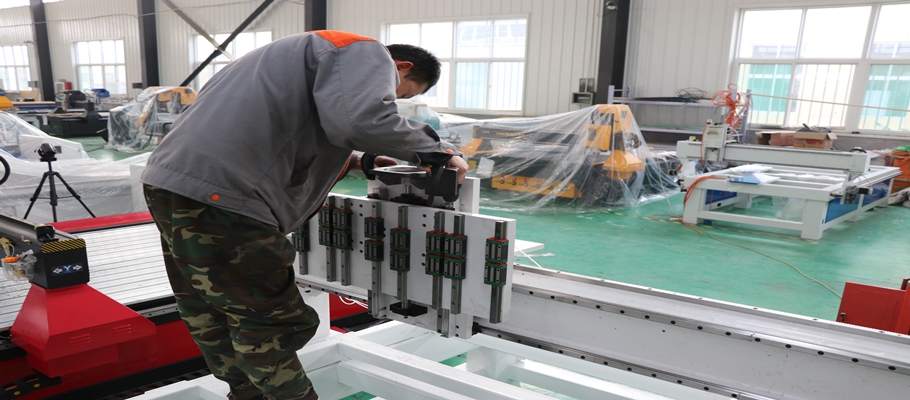
Y axis is also an important part of a CNC router. It is usually fixed on sides of the frame. Adding bearings and guide rails to the DIY CNC router will help maintain the rigidity of the router, and it will also enable the gantry move forwards and backwards along the Y axis. There are basically two types of guide rails, round rail and square rail. The round rail has high carrying capacity, low cost, short production cycle, and easy installation. While the square rail has high positioning accuracy, good reproduction and small friction coefficient. You may select round orbit or linear square guide for your homemade CNC router according to your design and budget.

6.Install a drive system
Now you have installed the fundamental parts that allow the tool of your homemade CNC router to move forwards and backwards, it is time to add a system that actually make it to move along the axes. This is the drive system, which mainly includes drivers, motors, pulleys, screws, nuts and other parts. The motors and drivers may be divided into servo motor or stepper motor and servo driver or stepper driver. You may choose the suitable motor and driver for the homemade CNC router according to your needs and budget. The motor and driver you choose shall be in the same type.
7.Install electronic parts
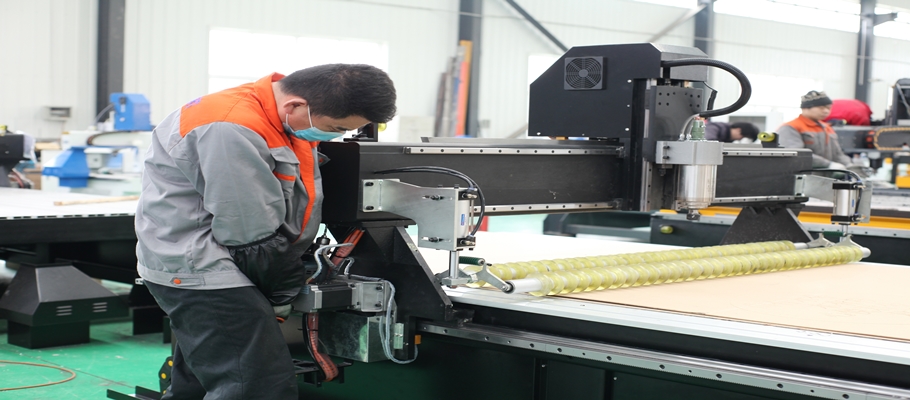
Now you are ready to install the electrical parts for the CNC router. There are many electrical aspects of the DIY CNC router, and these electrical parts are vital to the operation of your CNC router. These electronic parts typically include controllers, processors, inverters, fuse, circuit breakers, limit switches, motor wiring, buttons and other DIY CNC router kits. There are also some electronic features that are not often required, such as manual pulse generator (MPG), emergency stop button, touch-off tool sensors etc. These parts may or may not be essential to a CNC router, but they do increase user friendliness. Likewise, you may choose electronic parts for your CNC router on the basis of your own purpose and budget.
8.Install the working table
The worktable of a CNC router is the surface that the router will work on. It should allow the material to be clamped down easily and securely. The worktable can be made of plywood, MDF or metal. If your budget is enough, you may choose a T-slot and vacuum table for your CNC router, while if you have a tight budget and you need to cut hard materials, you may choose a common aluminum table.
9.Choose control system
The control system is vital to the operation of a CNC router, and it acts as the “brain” of the entire system. This is the part that interprets the signals given by the processor or computer, and transforms them into signals for the electronic parts of your CNC router. There are may brands of controller, such as Germany Siemens, Taiwan SYNTEC, Italian OSAI etc. You may choose one that you can afford when build a DIY CNC router.
10.Select software
To make your DIY CNC router to operate, you also need to select software to control the router. Most of the software will use languages such as G-code to control the movement of your CNC router along the three axes, enabling you to do your machining work. You can choose appropriate software according to your purpose and budget when building a CNC router.
Conclusion
After completing the foregoing steps, you should be able to start operating your DIY CNC router. You can now reap the benefits of having your very own DIY wood CNC machine. Once you can use the CNC router effectively, it’ll be a great tool for your maker space.
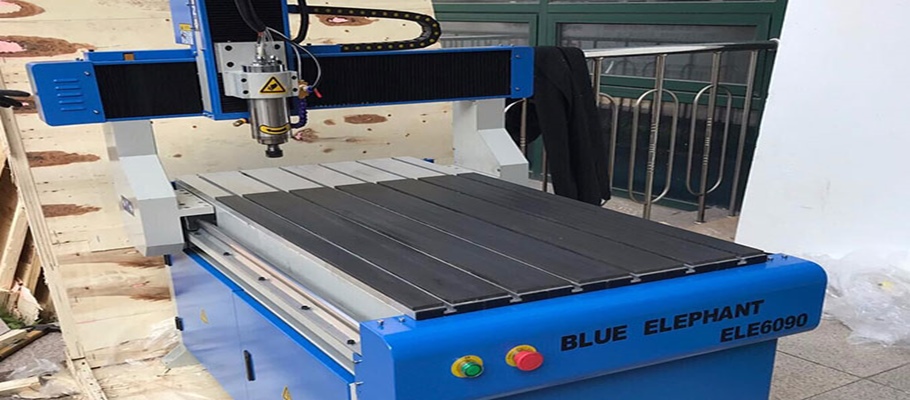
If you find any trouble or difficulty in the course of DIY CNC router or have problems to choose the right DIY CNC router kits, you may reach out for help from Blue Elephant. Blue elephant has rich experience in both the DIY CNC router and customized CNC router. We can not only provide you with professional DIY process, but also provide a variety of machine types. Feel free to contact us if you want to learn more about DIY CNC router.


