The first CNC machine I ever set up was a disaster.
I followed the manual, watched tutorials, and thought I had everything under control. But within minutes of starting the job, the spindle slammed into the workpiece, the tool snapped, and I was left staring at a mess.
That mistake cost me time, money, and confidence. I realized then that knowing the steps isn’t enough—you have to understand how they work together.
If you’ve ever struggled with CNC setup, tool selection, or machine calibration, I’ve been there. But through trial, error, and years of experience, I figured out how to make CNC machining predictable, efficient, and frustration-free.
In this guide, I’ll walk you through every step of the CNC process, from design and programming to setup, machining, and troubleshooting. By the end, you’ll have a clear roadmap to run your machine with confidence, avoid costly mistakes, and get the best results.
Let’s get started!
CNC Machining Workflow Overview
A well-executed CNC job doesn’t happen by chance.
It’s a combination of precise planning, smart execution, and careful finishing. To give you a clear starting point, here’s a step-by-step breakdown of the entire process before we dig into the details:
| Step | What Happens | Why It’s Important | Key Actions |
| 1. Design & CAD Model Creation | A 2D or 3D model is created in CAD software. | This serves as the blueprint for machining. Any errors here will affect the final part. | – Use software like AutoCAD, Fusion 360, or SolidWorks. – Define dimensions, tolerances, and material compatibility. – Export in formats like DXF, STL, or STEP. |
| 2. CAM Programming & Toolpath Generation | CAD model is converted into machine-readable G-code. | The machine needs clear instructions to cut efficiently and accurately. | – Choose the correct toolpaths (contour, pocketing, drilling). – Set machining parameters: spindle speed, feed rate, and depth of cut. – Run simulations to catch errors before machining. |
| 3. CNC Machine Setup | The workpiece and cutting tool are secured, and the machine is calibrated. | A bad setup can lead to miscuts, wasted material, or broken tools. | – Select the right CNC machine for the job. – Clamp the workpiece securely using fixtures, clamps, or vacuum tables. – Install the correct tool and set the work offset (zero point). |
| 4. Running a Test Cut (Simulation & Dry Run) | A test run is performed without cutting material. | Catches programming errors, tool crashes, and misalignment before real machining begins. | – Run a simulation in CAM software. – Perform a dry run with the cutting tool raised. – Verify tool movement, clearance, and direction. |
| 5. Executing the CNC Machining Process | The G-code is loaded, and the machine starts cutting. | Monitoring the process helps prevent tool breakage and machining errors. | – Load G-code via USB, direct connection, or built-in memory. – Watch for unusual noises, vibration, or overheating. – Adjust feed rate or spindle speed if needed. |
| 6. Inspection & Quality Control | The machined part is measured and checked for defects. | Ensures the part meets design specifications and is free of surface flaws. | – Use calipers, micrometers, or CMMs to check dimensions. – Inspect for rough edges, burrs, or tool marks. – Re-run toolpaths if small adjustments are needed. |
| 7. Post-Processing & Finishing | The part is smoothed, cleaned, and prepared for use. | A good finish improves part performance, safety, and aesthetics. | – Deburr sharp edges and polish if needed. – Assemble multiple components if applicable. – Clean the part to remove dust, coolant, or oil. |
Understanding the process is the first step toward flawless CNC machining. Now, let’s go through each stage in detail, so you know exactly what to do at every step.
Step 1: Design & CAD Model Creation
CNC machining starts long before the machine even moves. It begins with design.
Think of it this way: if your blueprint is flawed, the final part will be too.
No matter how advanced your CNC machine is, it can only follow the instructions you give it. That’s why the design phase is the foundation of everything.
Why Design Matters in CNC Machining
Imagine cutting wood without measuring first. The pieces wouldn’t fit together, right? CNC machining works the same way.
A well-planned design:
- Prevents errors: bad dimensions lead to wasted materials.
- Improves accuracy: tight tolerances require precise planning.
- Saves time: a good design reduces adjustments during machining.
Skipping the details here could mean redoing the entire job later.
Creating the CAD Model
CAD stands for Computer-Aided Design. It’s the software where you create a 2D drawing or a 3D model of your part.
Common CAD programs include:
- AutoCAD: Great for technical drawings and 2D layouts.
- Fusion 360: Ideal for parametric modeling and complex designs.
- SolidWorks: Used widely in engineering and manufacturing.
Each program has different features, but they all let you design parts with precise measurements and tolerances.
Key Design Considerations
Before you move to the next step, ask yourself:
- Are the dimensions correct? Even a small error can ruin the final product.
- What material is being used? Metals, plastics, and wood behave differently when machined.
- What’s the tolerance level? Some industries require tight tolerances, while others allow slight variations.
Saving the File in the Right Format
Once your design is ready, you’ll need to export it into a format your CNC software can read.
Common file types include:
- DXF: Best for 2D cutting and engraving.
- STL: Standard for 3D printing and CNC milling.
- STEP: Used for sharing 3D models across different software.
Using the wrong file format can cause translation errors, which may lead to incorrect cuts.
Step 2: CAM Programming & Toolpath Generation
I’ll never forget my first attempt at CAM programming.
I had my CAD model ready, loaded it into the software, and hit generate. It looked perfect on the screen, so I sent it to the machine. Within seconds, the tool plunged too deep, stalled the spindle, and snapped in half.
Turns out, I had skipped an important step: understanding toolpaths and machining parameters. That mistake cost me a cutter and a lot of frustration.
A CAD model is just a drawing. It tells you what the part should look like, but it doesn’t tell the CNC machine how to cut it.
CAM software bridges that gap.
It takes your CAD design and converts it into machine-readable instructions. Without this step, your CNC machine wouldn’t know where to move, how fast to cut, or which tool to use.
Think of it like GPS for your CNC machine: it needs clear directions to get the job done right.
Generating the Toolpath
The toolpath is the route your cutting tool follows to shape the material. Choosing the right toolpath is critical:
- A bad toolpath = wasted material, tool breakage, and poor accuracy.
- A good toolpath = clean cuts, smooth operation, and a high-quality part.
Different toolpaths serve different purposes:
- Contour cutting: Follows the edges of a design.
- Pocketing: Clears out an interior section of material.
- Drilling: Creates precise holes in set locations.
I’ve learned the hard way that choosing the wrong toolpath can turn a simple job into a nightmare.
Setting Up Machining Parameters
Even with the right toolpath, your machine needs proper settings to perform well. These include:
- Spindle speed: How fast the cutting tool spins.
- Feed rate: How quickly the tool moves through the material.
- Depth of cut: How much material is removed per pass.
- Coolant application: Helps prevent overheating and tool wear.
Exporting the G-Code
The final step in CAM programming is exporting the G-code.
G-code is the language CNC machines understand. It tells the machine exactly how to move—step by step. Once you generate the G-code, you’re ready to load it into your CNC controller and start machining.

Step 3: CNC Machine Setup
CNC machining is precise, but only if you set up the machine correctly. A simple mistake in setup can ruin an entire job.
I learned this lesson the hard way when I rushed through the setup process and ended up with a workpiece that was completely off-center. That mistake cost me time, material, and patience.
A proper setup is more than just loading a file and pressing start. It involves choosing the right machine, securing the material, selecting the correct tool, and calibrating the machine properly.
Choosing the Right CNC Machine for the Job
Not all CNC machines are the same. The type of machine you use should match the material, design, and precision required.
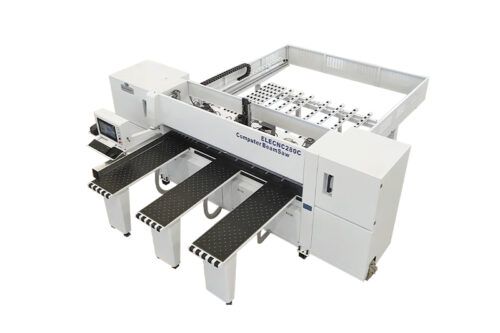
- CNC Routers: Best for wood, plastics, and soft metals.
- CNC Mills: Ideal for metal parts requiring high precision.
- CNC Lathes: Used for cylindrical parts.
- Laser or Plasma Cutters: Great for cutting sheet materials.
Using the wrong machine can lead to poor-quality cuts, excessive tool wear, or even machine damage.
Securing the Workpiece
A loose workpiece can shift during machining, causing inaccurate cuts or dangerous tool crashes. Secure it properly using:
- Clamps: For small, rigid materials.
- Vacuum tables: Great for flat sheets or delicate materials.
- Custom fixtures: Used for irregularly shaped parts.
Double-check that your material is aligned and held firmly before running the job.
Selecting the Right Cutting Tool
Your cutting tool must match the material and type of cut you need.
- Carbide tools: Best for metals due to their hardness and heat resistance.
- High-speed steel (HSS) tools: Work well for softer materials like wood and plastic.
- Coated tools: Improve performance and extend tool life.
Using the wrong tool can lead to rough edges, tool breakage, or poor surface finishes.
Calibrating the Machine Origin (Zero Point/Work Offset)
Every CNC machine needs to know where to start cutting. This is done by setting the zero point, also called the work offset.
- X and Y zero: Set based on the design’s starting point.
- Z zero: Ensures the cutting tool starts at the correct height.
If your zero point is off, your entire part will be misaligned. Take the time to check and adjust it properly.
Checking Lubrication, Coolant, and Dust Collection Systems
Before running a job, check these systems to keep your machine running smoothly:
- Lubrication: Reduces friction and prevents wear.
- Coolant: Keeps the tool and workpiece from overheating.
- Dust collection: Essential for wood and plastic cutting to maintain accuracy and safety.

Step 4: Running a Test Cut (Simulation & Dry Run)
I once skipped a test run because I was in a hurry. Big mistake.
The spindle dropped too fast, the tool dug too deep, and within seconds, I had a broken cutter and a ruined workpiece. That one oversight cost me both time and money.
Skipping a test run is like driving a car without checking the brakes. It’s a small step that can prevent big problems.
Why You Should Never Skip a Test Run
A CNC machine follows your instructions exactly. If there’s an error in your setup, toolpath, or programming, the machine won’t correct it, it will cut right into your material, whether it’s right or wrong.
A test run helps you:
- Avoid tool crashes: Running the wrong coordinates can break tools or damage the spindle.
- Prevent material waste: A misplaced cut can ruin an entire workpiece.
- Catch programming errors: A small mistake in the toolpath can send the cutter in the wrong direction.
Running a CNC Simulation in Software
Before you start the machine, run a simulation in your CAM software.
- What does it do? A simulation shows the exact movement of the tool before cutting.
- Why is it important? It helps you spot incorrect toolpaths, rapid movements, or clearance issues.
Many software programs, like Fusion 360, Mastercam, and Vectric, have built-in simulation tools. Use them. They can save you from costly mistakes.
Performing a Dry Run Without Material
Even after a simulation, always perform a dry run on the machine.
- Load the G-code into your CNC controller.
- Remove the cutting tool or raise it above the material.
- Run the program and watch the machine’s movement.
Check that:
- The tool moves in the right direction.
- It doesn’t collide with clamps or fixtures.
- Rapid moves don’t put stress on the machine.
This step confirms everything before making a single cut.
Step 5: Executing the CNC Machining Process
This is the moment of truth. After all the prep work, designing, programming, setting up, and testing. It’s time to start the actual machining.
But pressing “Start” doesn’t mean you can step away just yet.
Even the best setup can go wrong if you’re not paying attention. A small miscalculation can lead to tool breakage, material waste, or even machine damage.
That’s why monitoring the process is just as important as setting it up.
Loading the G-Code into the CNC Controller
The G-code is the final set of instructions that tells your machine what to do. You need to transfer it from your CAM software to your CNC controller.
Common transfer methods:
- USB drive: Simple and widely used.
- Direct computer connection: Sends data from software straight to the machine.
- Built-in memory: Some machines store and recall previous jobs.
Once loaded, double-check that you’ve selected the right file. Running the wrong G-code could mean cutting a completely different part than planned.
Monitoring the Machining Operation
You can’t just hit “Start” and walk away. The machine might be precise, but unexpected issues can happen. Stay close and watch the process carefully.
- Look for smooth tool movement. Any jerky motion could signal a problem.
- Listen for unusual sounds. A loud screeching noise could mean improper feed rates or tool wear.
- Adjust feed rates if needed. If the tool is cutting too aggressively, slow it down to prevent breakage.
How to Avoid Machine Errors and Tool Breakage
A broken tool in the middle of a job is frustrating—and expensive. Prevent this by watching for:
- Excessive vibration: This could mean loose workpieces, improper tool selection, or incorrect speeds.
- Overheating: A tool that’s too hot may need better coolant application or a slower cutting speed.
- Cutting inconsistencies: If edges look rough or uneven, check your spindle speed and feed rate.
Step 6: Inspection & Quality Control
The machine stops. The cutting is done. But your job isn’t over yet.
Just because a CNC machine follows instructions doesn’t mean every part comes out perfect.
The first time I skipped an inspection, I regretted it.
I had just finished a job, and everything looked good at first glance. The dimensions seemed right, and I was in a rush to move on. But when the customer checked the part, they found the holes were slightly too small, just enough to throw off the assembly. I had to redo the entire batch.
No matter how confident you are, always double-check.
Checking Part Dimensions Against Design Specifications
Precision is everything in CNC machining. A part that’s even slightly off can cause assembly issues or performance failures.
How do you check if the part matches your design? Use measuring tools:
- Calipers: Great for quick measurements of width, depth, and thickness.
- Micrometers: Best for high-precision measurements, down to the smallest increments.
- Coordinate Measuring Machines (CMMs): Used for complex parts with multiple dimensions that need verification.
A small error might seem minor, but in industries like aerospace, automotive, or medical, even a fraction of a millimeter can make a difference.
Detecting Surface Defects
Even if the dimensions are perfect, the surface finish needs to be clean.
Look for:
- Rough edges or burrs: These can affect how parts fit together.
- Tool marks: Visible lines on the surface could mean incorrect feed rates or dull tools.
- Scratches or dents: Mishandling or poor material clamping can cause damage.
If a part has defects, it may require additional finishing or post-processing.
Making Minor Adjustments for Final Accuracy
Sometimes, a part isn’t completely wrong, it just needs a small correction. Instead of scrapping it, you can re-run toolpaths to fix mistakes.
- If the hole is slightly too small: A final pass with a different tool can fix it.
- If the edges are rough: Sanding or deburring can smooth them out.
- If the depth isn’t correct: A light finishing cut may help.
Quality control isn’t just about catching mistakes. It’s about delivering a part that works perfectly the first time. That’s why having a reliable CNC machine matters just as much as the process itself.
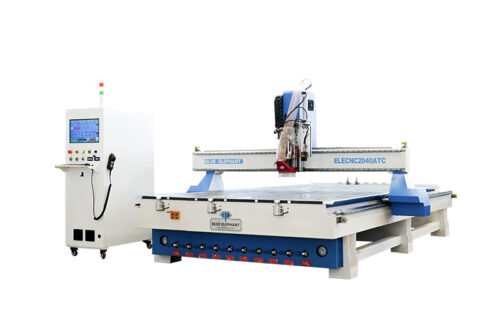
At Blue Elephant, we build CNC machines that deliver precision, efficiency, and consistency, so your finished parts meet the highest standards. If your current machine isn’t cutting it, maybe it’s time for an upgrade. Explore Blue Elephant’s CNC solutions and see the difference.

Step 7: Post-Processing & Finishing
The machining is done, but the part isn’t ready yet.
I used to think that once the CNC machine finished cutting, the job was complete. But then I handed over a part straight from the machine with sharp edges, rough surfaces, and machining marks still visible. The customer wasn’t impressed.
I realized that finishing is just as important as cutting.
Surface Treatments: The Final Touch
Raw CNC-machined parts often have small imperfections. Sharp edges, burrs, and tool marks can make a part harder to handle, assemble, or even use.
Common surface treatments include:
- Sanding: Smooths out rough spots and prepares for painting or coating.
- Deburring: Removes sharp edges that could cause safety issues or misalignment.
- Polishing: Gives metal and plastic parts a clean, finished look.
- Coating: Adds durability, corrosion resistance, or a specific appearance (paint, anodizing, or powder coating).
Skipping this step can make even a perfectly machined part look and feel low quality.
Assembling CNC-Machined Components
If the part is part of a larger assembly, test fitting is crucial. A single misaligned hole or rough edge can cause issues.
When assembling CNC-machined parts:
- Check fitment: Parts should slide or lock into place without force.
- Test movement: If the assembly has moving parts, check for smooth operation.
- Verify tolerances: Sometimes a small adjustment, like light sanding, is needed for a perfect fit.
Final Cleaning Before Delivery or Installation
The last step is making sure the part is clean and ready to use.
- Blow away dust and chips with compressed air.
- Wipe surfaces with a clean cloth to remove oil or fingerprints.
- Inspect under good lighting to catch any last-minute flaws.
Post-processing is what separates a rough prototype from a finished product. It’s the last step that turns raw machining into something a customer will be proud to receive.
Conclusion
I’ve seen what happens when you rush a CNC job. Broken tools, wasted materials, and hours of frustration.
But I’ve also seen the difference when you take the time to do it right. A well-planned design. A carefully set toolpath. A machine that moves smoothly and delivers precise results.
CNC machining rewards attention to detail and the right equipment.
So, what’s your next step? Will you keep improving your process?
If you need a CNC machine that helps you work smarter, not harder, contact Blue Elephant today.