I used to think packaging was just an afterthought—until I had to deal with shipping damages and unhappy customers. It turned out that choosing the wrong type of corrugated box cost my business more than I realized.
That’s when I decided to understand exactly how these boxes are made and what makes them durable.
This guide is packed with insights from industry experts and packaging manufacturers, ensuring you get practical, no-fluff information that matters for your business.
We’ll walk through the step-by-step process of corrugated box production, so you can confidently choose the best packaging for your needs.
Let’s get into it!
Step#1 Sourcing and Preparing Raw Materials
Corrugated boxes don’t just appear on a production line—they start at the source. The quality of your packaging depends entirely on where and how the raw materials are sourced and prepared. Get this step right, and you have strong, durable boxes that protect your shipments.
Get it wrong? You’re looking at weak packaging, damaged products, and unnecessary costs.
Let’s break it down.
Sourcing the Right Paper
The backbone of every corrugated box is kraft paper, a high-strength material made from softwood trees like pine, spruce, and fir. These trees are selected because of their long, durable fibers, which create stronger, more tear-resistant packaging.
But sourcing the right material isn’t just about picking any wood—it’s about choosing sustainable, high-quality sources that balance strength, cost, and environmental responsibility.
- Selecting the Right Trees
- Manufacturers primarily use softwood trees (pine, spruce, fir) because of their long, strong fibers, which enhance durability.
- Hardwoods (like oak or birch) are rarely used, as their shorter fibers result in weaker paper.
- Harvesting and Sustainable Forestry
- Trees are harvested from managed forests, ensuring that for every tree cut down, another is planted.
- Many suppliers follow FSC (Forest Stewardship Council) or PEFC (Programme for the Endorsement of Forest Certification) standards for responsible forestry practices.
- Processing the Wood into Pulp: The harvested trees are debarked and chipped into small pieces. These wood chips are sent to pulping mills, where they are broken down into fiber using either:
- Chemical pulping (Kraft process) for stronger, high-quality paper.
- Mechanical pulping for cheaper, lower-strength paper.
- Integrating Recycled Paper: Many manufacturers blend in post-consumer recycled fibers to reduce costs and environmental impact. The ratio of virgin fibers to recycled fibers affects the final box’s strength:
- More virgin fibers = Stronger, stiffer, more durable boxes.
- More recycled fibers = More eco-friendly, but with slightly reduced durability.
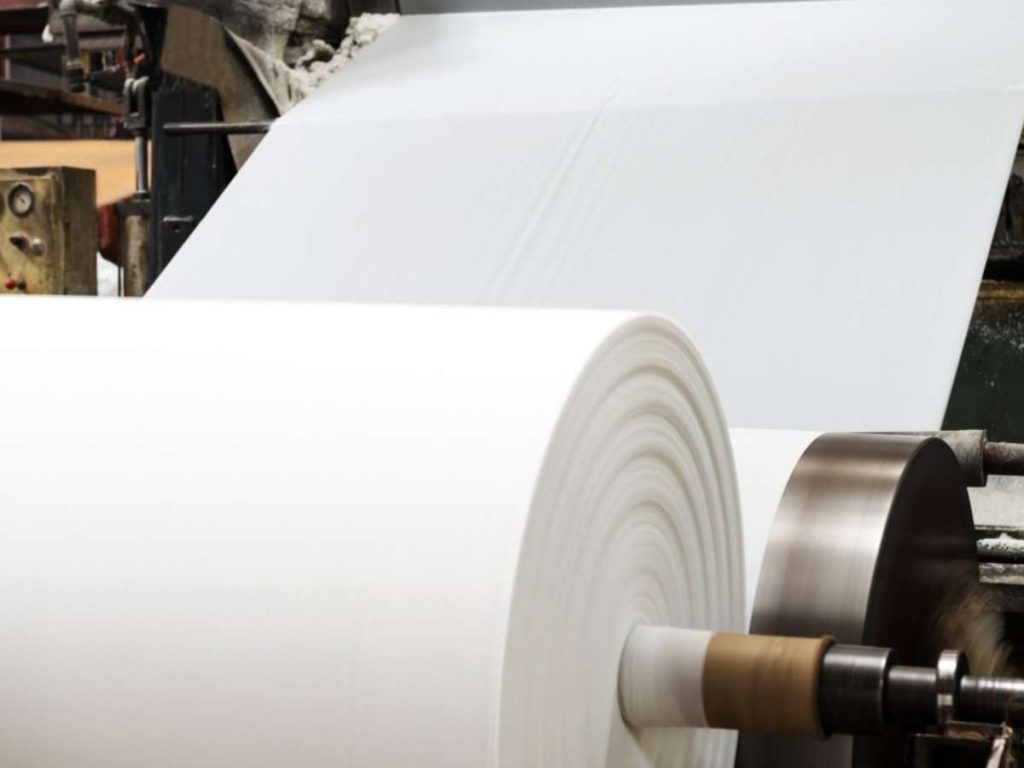
- Paper Roll Formation & Quality Control: The processed pulp is formed into huge rolls of kraft paper, which will later be used to make corrugated boards. Each roll is tested for strength, flexibility, and moisture balance to ensure consistency before moving to the next stage.
The Pulping Process
Before wood can become kraft paper, it must be turned into pulp. This process separates the fibers and prepares them for paper production. There are two main methods:
Chemical Pulping (Kraft Process)
This is the gold standard for high-strength paper. Wood chips are treated with chemicals to dissolve the weaker parts of the wood, leaving behind only the strongest fibers. The result? A tough, flexible paper that forms the foundation of durable corrugated boxes.
Mechanical Pulping
This method grinds wood down into pulp using machines. While it’s more cost-effective and retains more of the wood, it weakens the fibers, producing lower-strength paper.
For businesses shipping heavy, fragile, or high-value products, choosing kraft-processed paper is crucial to ensure maximum box strength.
Preparing for Corrugation
Once the pulp is processed, it’s formed into huge rolls of kraft paper. But before this paper can be used in corrugated boxes, it must be properly prepared.
One of the biggest factors? Moisture content.
- Too dry? The paper becomes brittle, leading to cracks and tears.
- Too moist? The paper loses strength, making the box vulnerable to crushing.
To prevent these issues, manufacturers carefully control humidity levels, ensuring the paper has just the right balance of flexibility and durability.
Step#2 Creating the Corrugated Medium
Now that the raw materials are sourced and prepared, it’s time to create the corrugated medium—the fluted layer that gives a box its strength, impact resistance, and cushioning ability.
Without this step, a corrugated box would just be flat sheets of paper, offering little protection against crushing or impact during shipping. The key to durability lies in the unique wavy structure that sits between the outer layers.
The Process of Making the Corrugated Medium
- Feeding Kraft Paper into the Corrugator: Large rolls of kraft paper, sourced in Step #1, are fed into a corrugating machine. This machine controls moisture and heat, making the paper flexible enough for shaping.
- Passing Through Heated Corrugating Rolls: The kraft paper is pressed between 2 heated corrugating rolls that create its distinctive wavy pattern (fluting). Heat and pressure lock the flutes into shape, ensuring they stay rigid and strong.
- Applying Starch-Based Adhesive: A thin layer of starch-based glue is applied to the tips of fluted paper. This adhesive is what bonds the corrugated medium to the outer linerboards in the next step.
- Drying and Curing: The glued medium passes through a drying section, where heat sets the adhesive. This ensures a secure bond that won’t weaken during shipping or storage.
Why This Step Matters
- Stronger Boxes = Fewer Damaged Shipments
- A properly formed corrugated medium absorbs impact, reducing breakage rates.
- Customization for Different Needs
- Flute sizes can be adjusted based on whether you need more cushioning (larger flutes) or more stacking strength (smaller flutes).
- Cost-Efficiency
- The right flute structure balances material usage and durability, helping businesses avoid unnecessary packaging costs.
Step#3 Forming the Corrugated Board
At this stage, the corrugated medium is transformed into a fully structured corrugated board. This process is where the strength, durability, and integrity of your packaging truly come together.
A well-formed corrugated board ensures that your boxes can withstand heavy loads, resist crushing, and provide maximum protection for your products. If this step isn’t done correctly, the result is weaker packaging, higher damage rates, and unnecessary costs for your business.
Composition of Corrugated Board
A corrugated board is made up of multiple layers:
- Outer Liner: The smooth, printable surface of the box, providing structure and branding potential.
- Corrugated Medium (flutes): The wavy layer that gives the box its cushioning and strength.
- Inner Liner: The inside surface of the box, reinforcing durability and protecting products.
Depending on your packaging needs, boards can be made stronger by adding multiple flute layers, such as double-wall or triple-wall corrugated boards.
Forming the Corrugated Board
- Applying Adhesive to the Fluted Medium: The fluted paper, created in Step #2, is coated with starch-based adhesive at its peaks. This glue needs to be precisely applied—too little, and the board won’t bond properly; too much, and it can cause warping.
- Bonding the First Liner to the Fluted Medium: The first liner is pressed onto fluted paper. Using heat and pressure, the adhesive is activated, creating a strong, permanent bond between the two layers.
- Adding the Outer Liner: Once the first bond is secure, the outer liner is attached in the same way. The result is a single-wall corrugated board, which is used in most standard shipping boxes.
- Creating Double-Wall and Triple-Wall Boards: If extra durability is needed, a 2nd or 3rd fluted medium is glued between additional linerboards. These double-wall and triple-wall configurations are ideal for industrial packaging and export shipping.
- Running Through a Hot Plate Section: The fully assembled corrugated board passes through a series of heated plates that cure the adhesive. This ensures stability, prevents delamination, and reinforces structural integrity.
- Quality Inspection and Cutting: The finished boards are inspected for glue consistency, strength, and evenness. They are then cut into large sheets, ready for further processing (printing, die-cutting, and assembly).
Types of Corrugated Boards
Choosing the right corrugated board matters impacts cost, strength, and product protection. Here’s how different board types compare:
| Type of Corrugated Board | Strength Level | Common Uses | Key Benefits |
| Single-Wall Corrugated | Light to Medium Duty | – Retail boxes – E-commerce packaging – Lightweight shipments | – Cost-effective – Easy to handle – Sufficient for lighter items |
| Double-Wall Corrugated | Heavy-Duty Applications | – Industrial shipments – Warehouse storage solutions | – Extra strength – Suitable for fragile and bulky items |
| Triple-Wall Corrugated | Maximum Strength & Protection | – Export packaging – Machinery parts – Industrial equipment | – Replaces wooden crates – High strength-to-weight ratio |
Step#4 Drying and Cutting the Corrugated Board
At this stage, the corrugated board has been fully formed, but it’s not yet ready to be turned into a functional box. It needs to go through a crucial drying and cutting process to ensure consistency, durability, and proper sizing.
If this step is skipped or rushed, the board could warp, weaken, or be cut incorrectly, leading to misaligned folds, improper assembly, or structural failures when the box is used for shipping.
The Importance of Drying
Before the board can be cut, it needs to be properly dried to prevent moisture-related defects. Excess moisture can cause the board to warp or become too soft, making it unstable for stacking.
Too little moisture can make the board brittle, leading to cracking and tearing during folding or transit. Proper drying ensures a strong, rigid, and uniform structure, ready for precision cutting.
- How is it dried?
- The hot plate section of the corrugator applies controlled heat and pressure, evaporating excess moisture while maintaining flexibility.
- Some manufacturers use air-drying chambers to further stabilize the board before cutting.
Cutting the Corrugated Board
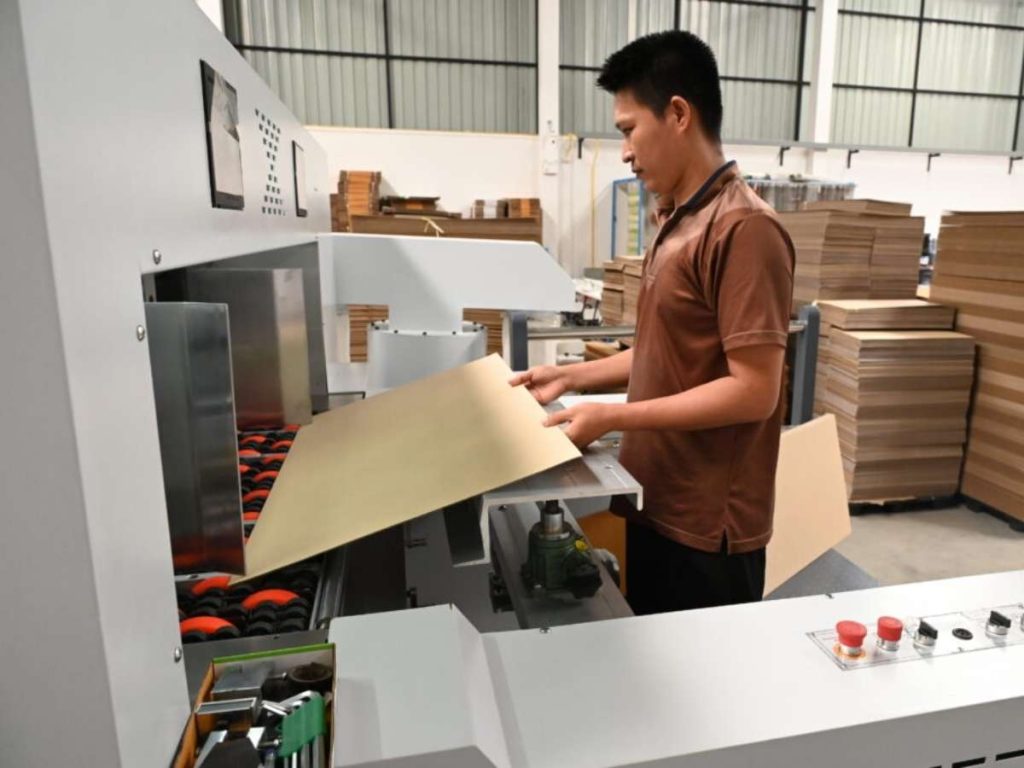
After drying, the board is still in large sheets, which must be trimmed, cut, and shaped into the correct sizes before moving to the next steps. This is done using high-precision cutting machines to ensure uniformity.
- Trimming the Edges: The edges of the large corrugated sheets are trimmed to remove any uneven or weak sections. This ensures that all final sheets are precisely aligned and structurally sound.
- Slitting and Scoring: The board passes through a slitter-scorer machine, which:
- Slits (cuts) the board into specific widths, creating box panels.
- Scores (creases) the board along fold lines, allowing for easy assembly later.
- Scoring is critical because it determines how easily the box will fold without cracking or breaking.
- Sheeting for Different Box Designs: Depending on the type of box being produced, the board is either:
- Cut into flat sheets for die-cutting.
- Left in continuous sheets for further processing into large-format boxes.
Step#5 Printing and Branding
I still remember the first time I received a bulk order of plain brown boxes for my business. Functional? Sure. But when they arrived at my customers’ doors, they looked like every other box out there—zero branding, zero personality, and zero impact.
It didn’t take long to realize that packaging isn’t just about protection—it’s a marketing tool.
Printing and branding transform a standard corrugated box into something recognizable and valuable. Whether it’s a bold logo, product details, or handling instructions, the right printing ensures your box does more than just hold your product—it represents your brand.
Role of Printing
Corrugated boxes aren’t just containers—they’re silent salespeople. The printing process allows businesses to:
- Reinforce brand identity with logos, colors, and messaging.
- Provide essential product information such as barcodes, SKU numbers, and instructions.
- Enhance customer experience with custom designs that make the packaging feel premium.
But not all printing methods are the same. Choosing the right one depends on cost, design complexity, and the quantity of boxes you need.
The Printing Process
- Preparing the Design
- The process starts with a digital or physical mockup of the box’s design.
- Logos, graphics, and text are placed according to the box’s folding structure to ensure proper alignment.
- High-volume orders often require custom printing plates, while smaller batches can use digital printing.
- Choosing the Right Printing Method: Each printing method has its pros and cons, depending on budget, color requirements, and order size.
- Flexographic Printing (Flexo): The industry standard for large-volume orders.
- Uses flexible rubber plates to transfer ink onto the box.
- Best for simple designs, logos, and one- to three-color prints.
- Cost-effective for bulk production.
- Lithographic Printing (Litho-Laminating): For high-quality, full-color images.
- Prints detailed designs onto paper, which is then laminated onto the corrugated board.
- Ideal for premium packaging, retail displays, and high-end product boxes.
- More expensive but delivers professional, photo-quality results.
- Digital Printing: Great for short runs and custom designs.
- No printing plates required—direct ink application to the board.
- Perfect for e-commerce brands that need limited-edition or personalized packaging.
- Higher per-unit cost, but flexible for small batches.
Branding
One of my biggest mistakes early on was thinking that a logo was enough to make a box stand out. But branding goes beyond just stamping your name on a package—it’s about how the box makes your customer feel when they receive it.
- Minimalist branding? Conveys premium quality and sophistication.
- Bold, colorful packaging? Makes an impact in retail spaces.
- Sustainable messaging? Tells customers you prioritize eco-friendliness.
Every element—from font choice to ink color to box finish—plays a role in shaping your brand’s identity.
Additional Enhancements
Beyond printing, businesses use extra design elements to elevate their packaging.
- Matte or glossy coatings to enhance the look and feel.
- Embossing or debossing to add texture and a high-end touch.
- Spot UV treatments to make certain parts of the design pop.
- Die-cut windows to showcase products inside the box.
Step#6 Die-Cutting and Creasing
I’ll never forget the first time I opened a shipment of custom boxes for my business. I expected neatly folded, ready-to-assemble cartons. Instead, I got mismatched folds, jagged edges, and boxes that wouldn’t even close properly.
Die-cutting and creasing are the final shaping processes that transform large corrugated sheets into functional, foldable boxes.
- Die-cutting: Cuts out the exact shape of the box, including flaps, handles, and ventilation holes if needed.
- Creasing: Creates fold lines that allow for easy, accurate folding without cracking or tearing.
The Die-Cutting Process
Die-cutting is used when boxes need custom shapes, special cutouts, or structural modifications. The process works like a large industrial cookie cutter, stamping out box designs from corrugated sheets.
- Creating the Die-Cutting Template
- Engineers design a custom cutting die based on the box’s dimensions and structure.
- The die consists of sharp steel blades arranged in the exact shape of the final box.
- For bulk production, high-quality rotary dies are used, while flatbed dies handle smaller or complex orders.
- Placing the Corrugated Board on the Die-Cutting Press: The corrugated sheets, printed and cut to size in previous steps, are fed into the die-cutting machine. The machine presses the cutting die onto the board, slicing out the exact shape while maintaining structural integrity.
- Removing Excess Material: After cutting, the machine strips away scrap materials, leaving only the box’s shape. This step minimizes waste and ensures clean, smooth edges for folding and assembly.
The Creasing Process
Creasing is just as important as cutting, it ensures that boxes can fold easily without breaking or losing strength.
- Scoring the Board for Smooth Folding: Creasing tools press into the corrugated board without cutting all the way through. This creates precise fold lines that make assembly fast and seamless.
- Controlling Fold Depth and Pressure
- The pressure must be just right—too deep, and the board weakens; too shallow, and it resists folding.
- Proper creasing keeps the flaps aligned and ensures that boxes can be stacked and sealed properly.
Boxes That Require Die-Cutting
Not all boxes go through the die-cutting process—some are made with standard slotted machines. However, die-cutting is necessary for customized designs, such as:
- Self-locking mailer boxes (common in e-commerce packaging).
- Retail display boxes with perforations or pop-out sections.
- Custom-shaped shipping boxes with handles or ventilation holes.
- Folding cartons for food, cosmetics, and fragile products.
Step#7 Folding and Gluing
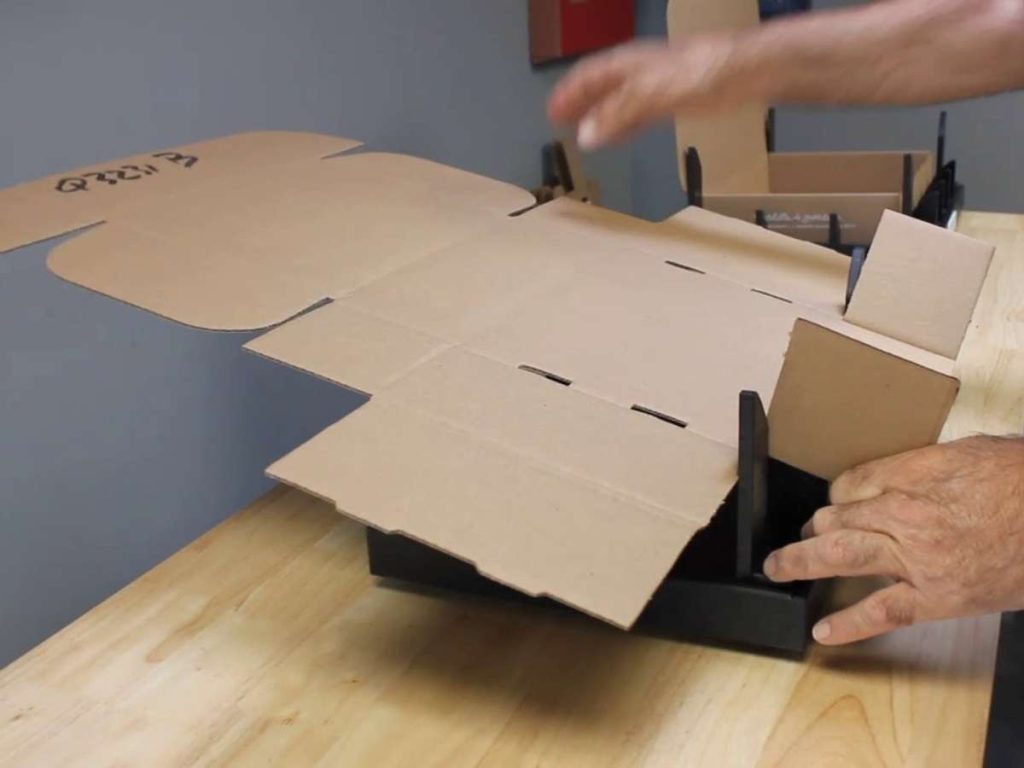
At this stage, the corrugated board—cut and creased in the previous step—takes its final shape. Folding and gluing ensure that the box is structurally sound, easy to assemble, and ready for packaging operations.
A properly folded and glued box holds its form, supports stacking, and protects the contents inside. If this step isn’t executed with precision, the box can lose stability, open during transit, or fail under pressure.
The Folding Process
Folding transforms a flat sheet of corrugated board into a functional, three-dimensional box.
- The board is guided through a folder-gluer machine, which bends the panels along pre-scored crease lines.
- High-speed conveyors ensure that every fold is precisely aligned to avoid gaps or misalignment.
- For some specialized designs, manual folding may be required for better accuracy.
Correct folding is crucial because misaligned folds can lead to:
- Uneven box structures that don’t stack properly.
- Weakened corners that compromise durability.
- Inaccurate box dimensions that don’t fit shipping requirements.
The Gluing Process
Once folded, the box needs strong adhesion to hold its shape. The gluing process involves:
- Applying Adhesive: A starch-based or hot-melt adhesive is applied along the box’s joining edges. The type of glue used depends on box design and durability requirements.
- Pressing and Bonding: The glued sections are pressed together under controlled pressure to create a secure bond. This ensures that flaps, seams, and joints remain intact throughout storage and shipping.
- Alternative Sealing Methods: Some boxes, like heavy-duty shipping cartons, use stitching or taping instead of glue for extra reinforcement. Once the glue has been set, the boxes are inspected for adhesion strength before moving to the final stages of production.
Step#8 Quality Control
By this stage, the corrugated box has been formed, cut, folded, and glued—but before it’s ready for distribution, it must go through rigorous quality control.
Poorly made boxes can lead to collapsed stacks, damaged goods, and expensive returns. A single weak point in a batch can result in supply chain disruptions, increased costs, and dissatisfied customers.
That’s why manufacturers perform multiple quality checks to ensure every box meets strength, durability, and dimensional accuracy standards.
Quality Control Measures
- Visual Inspection (Detecting Surface-Level Defects)
- Boxes are checked for misprints, irregular cuts, or improper folding.
- Operators examine glue application, seam alignment, and flute visibility to spot inconsistencies.
- Any boxes with visible flaws are removed from the batch.
- Dimensional Accuracy Testing (Ensuring Consistency in Box Size & Shape)
- Each box is measured to confirm it matches the exact specifications provided by the client.
- Even minor variations in dimensions can cause issues in stacking, palletization, and shipping efficiency.
- Edge Crush Test (ECT) (Measuring Stacking Strength)
- This test evaluates how much compressive force the corrugated board can withstand before collapsing.
- Boxes are placed between two metal plates and pressed down until they buckle.
- A higher ECT rating means the box can handle more weight without failing.
- Burst Strength Test (Checking Resistance to External Pressure)
- Measures how much force is needed to puncture or burst the box wall.
- Boxes with higher burst strength ratings provide better protection against impact and compression.
Importance
- Prevents Costly Returns & Damage Claims: Ensures products arrive undamaged, reducing return rates and refund expenses.
- Optimizes Supply Chain Efficiency: Properly tested boxes improve stacking, storage, and palletization, reducing warehouse and shipping costs.
- Meets Industry & Compliance Standards: Many industries (food, electronics, pharmaceuticals) require boxes that meet strict safety regulations.
Step#9 Stacking for Shipping
Once the corrugated boxes have passed rigorous quality control, they are ready for stacking and shipping. At this stage, efficiency and organization are key—improper stacking can lead to damaged boxes, wasted storage space, and logistical inefficiencies.
Manufacturers follow strict stacking methods to ensure that every box remains intact during storage, handling, and transportation. The goal is to maximize warehouse space, prevent crushing, and streamline distribution.
The Stacking Process
- Flattening for Easy Storage & Transport: Corrugated boxes are shipped in flat-packed bundles to save space. This allows businesses to assemble them only when needed, reducing storage costs.
- Bundling & Strapping for Stability: Once flattened, boxes are bundled using straps or shrink wrap to keep them secure. Automated machines apply consistent pressure to avoid over-tightening, which could cause damage.
- Stacking on Pallets: Bundles of flattened boxes are placed onto wooden or plastic pallets for easy handling. Boxes are stacked in a brick pattern or column stacking format to distribute weight evenly.
- Labeling & Barcoding for Tracking: Each pallet is labeled with batch numbers, product details, and order specifications. Barcodes and QR codes are added for warehouse inventory management and shipment tracking.
- Loading into Shipping Containers or Trucks: Forklifts move stacked pallets into trucks, shipping containers, or distribution centers. Weight distribution is carefully planned to prevent tipping, shifting, or crushing during transport.
Best Practices for Safe Stacking
- Use the Right Stacking Pattern: Column stacking for maximum weight-bearing strength. Interlocking stacking (brick pattern) for better stability.
- Follow Height & Weight Limits: Over-stacking can cause bottom layers to collapse, damaging the boxes. Weight should be evenly distributed across pallets to avoid shifting.
- Protect Against Moisture & Humidity: Boxes should be stored in dry environments to prevent warping or weakening. In humid climates, desiccants or dehumidifiers help maintain box integrity.
Importance
- Prevents Damage During Shipping: Well-stacked boxes retain their shape and structure, reducing losses from crushed packaging.
- Reduces Warehouse Costs: Efficient stacking maximizes storage space and lowers inventory handling costs.
- Ensures On-Time Delivery & Order Accuracy: Organized pallets speed up loading, tracking, and order fulfillment, improving supply chain efficiency.
Conclusion
Now you know, a corrugated box isn’t just a box. From sourcing raw materials to precise cutting, printing, and stacking, every step matters. The right packaging protects your products, strengthens your brand, and saves you money.
I learned this lesson the hard way, but you don’t have to. Whether you need stronger boxes, better branding, or expert advice, it’s time to take control of your packaging.
Are your current boxes meeting your expectations? Or is it time for an upgrade?
Let’s talk about how we can improve your packaging. Contact us today!
