I remember standing in front of my first CNC machine, staring at the control panel like it was written in another language. Buttons. Codes. A blinking screen.
I had no idea what to do next.
Should I press something? Adjust a setting? Was I about to break something expensive?
If that sounds familiar, you’re in the right place.
I’ve worked with CNC machines for years, and I know how confusing they can be in the beginning. This guide will break down everything in plain, simple steps fromhow to set up, load materials, enter the right commands, and run your machine without costly mistakes.
By the end, you’ll go from staring at the machine to running it with confidence.
So let’s get started!
1. Understanding CNC Machines
I remember the first time I saw a CNC machine in action. A block of wood went in, and minutes later, a perfect design was cut into it—smooth, precise, and identical to the digital file. It looked effortless. But when I got my own machine, I quickly realized there was a lot more to it.
CNC machines aren’t magic. They follow exact instructions, cutting, shaping, or engraving materials with incredible precision. But to get good results, you need to understand how they work.
What is a CNC Machine?
A CNC machine is a computer-controlled tool that automates cutting, drilling, engraving, and shaping materials. Instead of a person manually guiding a tool, a CNC machine follows pre-programmed instructions to create precise parts or designs.
Businesses use CNC machines for mass production. Hobbyists use them for custom projects. No matter the purpose, they save time and improve accuracy.
Types of CNC Machines
Not all CNC machines work the same way. Different types are built for different materials and cutting methods. Here are the most common ones:
- CNC Routers: Great for wood, plastic, and soft metals. Often used for furniture, signs, and custom carvings.
- CNC Mills: More powerful than routers. Used for shaping metal, wood, and plastics with extreme accuracy.
- CNC Lathes: Spin the material while cutting. Best for making round or cylindrical parts like screws and pipes.
- CNC Laser Cutters: Use a laser beam instead of a cutting tool. Perfect for engraving and detailed cuts on wood, acrylic, leather, and metal.
- CNC Plasma Cutters: Cut through metal using a high-temperature plasma torch. Common in metal fabrication and automotive work.
Each type has its strengths. Choosing the right one depends on what you need to do.
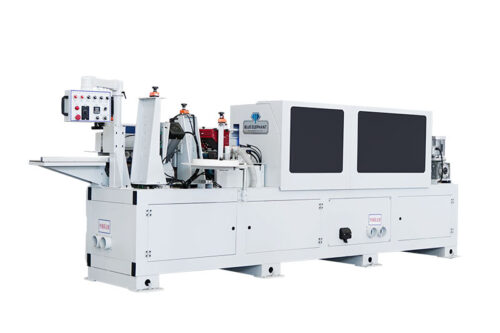
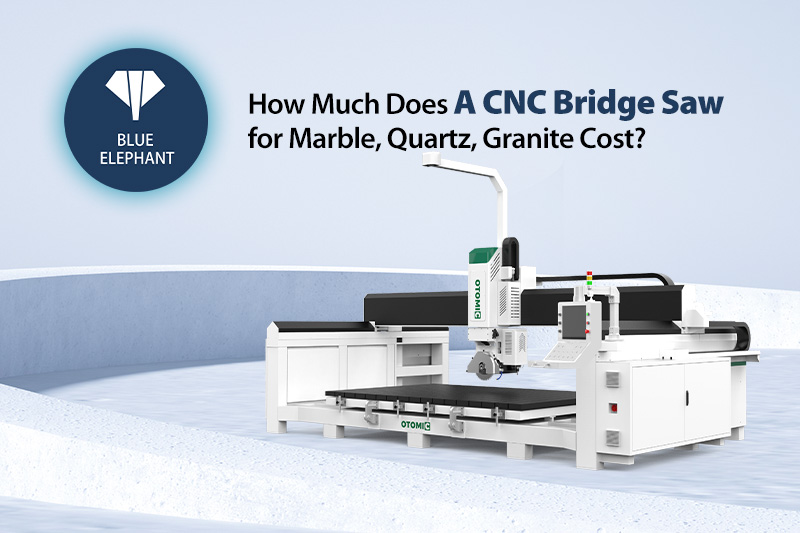
If you’re looking for a reliable and high-performance CNC machine, Blue Elephant offers solutions for both small businesses and large-scale production.
Key Components of a CNC Machine
CNC machines may look complicated, but they all share the same basic parts. Once you understand these, running the machine becomes much easier.
- Control Panel: This is where you enter commands and adjust settings. It’s like the brain of the machine. Some use buttons and dials, while others have touchscreen controls.
- Spindle: This is the part that does the cutting, engraving, or drilling. It spins at high speeds and holds different tools depending on the job.
- Tool Holders & Chucks: These secure the cutting tools in place. A loose tool can ruin a job, so locking it properly is crucial.
- Worktable & Fixtures: This is where the material sits. Clamps, vacuum tables, or jigs hold it steady so it doesn’t move while cutting.
- Coolant System: Cutting generates heat. A coolant system (either liquid or air) prevents tools from overheating and wearing out too fast.
- Motion System (Axis Movement): The machine moves along different axes:
- The X-axis moves left to right.
- The Y-axis moves front to back.
- The Z-axis moves up and down.
- Some machines also have a rotary axis for cutting at different angles.
Understanding these parts helps you troubleshoot problems and get better results.
At first, CNC machines can seem overwhelming. But once you break them down, they start to make sense. Learning what each part does is the first step to mastering CNC machining.
2. Setting Up a CNC Machine for the First Time
When I got my first CNC machine, I was excited. I wanted to power it on and start cutting right away. But I quickly learned that skipping setup steps leads to frustration and sometimes, expensive mistakes.
A CNC machine isn’t something you just plug in and use. It needs a proper workspace, a stable power supply, and the right safety checks before you even think about turning it on.
Let’s go through the setup step by step.
Machine Installation & Power Requirements
Where you place your CNC machine matters. A bad setup can cause vibrations, overheating, or even damage to your machine over time.
Setting Up the Workspace
- Place the machine on a solid, level surface. A wobbly table or uneven floor can throw off precision.
- Make sure the area has good ventilation. CNC machines generate dust, fumes, and heat. If you’re cutting wood or metal, air circulation is even more important.
- Keep enough space around the machine for easy access. You don’t want to squeeze into a tight corner every time you need to change a tool or remove a finished piece.
Power & Electrical Setup
- Check your CNC machine’s voltage requirements. Some machines run on standard outlets, while others need 220V or higher.
- Use a dedicated circuit if possible. Power fluctuations can cause shutdowns mid-cut or damage components.
- Ground the machine properly to avoid electrical hazards.
Connecting Additional Systems (If Applicable)
- Air Compressors: Some CNC machines use compressed air to keep dust away or to power pneumatic clamps. Make sure you have the right air pressure.
- Coolant Systems: If your machine has a coolant system, fill the reservoir with the right type of coolant and check the flow. A dry spindle can overheat fast.
Basic Safety Precautions Before Operating
CNC machines are powerful. If something goes wrong, injuries can happen fast. That’s why safety should always come first.
Protect Yourself
- Wear Safety Glasses: Flying dust, chips, or sparks can damage your eyes.
- Use hearing protection: CNC machines can be loud, especially routers and mills. Over time, constant noise can harm your hearing.
- Gloves? Only sometimes: They’re good for handling sharp materials but can get caught in moving parts. Avoid wearing gloves when operating the machine directly.
Protect Your Hands and Body
- Keep your hands away from moving parts. Never reach near the spindle, cutting area, or belts while the machine is running.
- Tie back long hair and avoid loose clothing. Anything that can get pulled into the machine is a serious risk.
Emergency Stops & Machine Checks
- Locate the emergency stop button before running the machine. If something goes wrong, you need to be able to stop it instantly.
- Check that the limit switches work. These prevent the machine from moving too far and causing damage.
- Do a dry run (no cutting) to make sure the movement is smooth and there are no unexpected issues.
Taking the time to set up your CNC machine properly will save you headaches, repairs, and wasted materials. Once everything is in place, you’ll be ready to move on to loading materials and running your first job with confidence.
3. Preparing Your CNC Machine for Operation
I’ve learned the hard way that rushing into a CNC job leads to wasted materials and frustration. The first time I cut a piece of acrylic, I didn’t secure it properly. Halfway through the job, it shifted. The bit dug too deep, cracked the material, and my design was ruined.
CNC machines are powerful tools, but they only work as well as the setup. Getting the material secured, picking the right tool, and calibrating everything makes all the difference between a clean cut and a costly mistake.
Selecting and Loading Materials
CNC machines can cut wood, metal, plastic, acrylic, and more. But each material behaves differently. If you don’t match your speed, tool, and clamping method to the material, you’ll run into problems.
Picking the Right Material
- Wood: Great for carving, but softer woods can splinter. A sharp bit helps.
- Metal: Requires slow speeds, the right bit, and sometimes a coolant.
- Plastic: Can melt if the speed is too high. A steady pace works best.
- Acrylic: Chips easily if cut too fast. Best with sharp bits and slower speeds.
Clamping the Workpiece Properly
A shifting workpiece can throw off the entire cut. I once started a job without double-checking my clamps, and by the time I realized the piece had moved, it was too late.
- Use clamps or a vacuum table to keep the material in place.
- Check that the workpiece is flat to prevent uneven cutting.
- Place clamps where they won’t interfere with the cutting path.
A quick shake test before starting can save you from mid-job disasters. If the material moves, tighten it down.
Choosing and Installing the Right Cutting Tools
The wrong tool can lead to rough edges, burning, or even tool breakage. One time, I tried to cut aluminum a bit meant for wood. Within seconds, the bit overheated and snapped.
Common CNC Cutting Tools
- End Mills: Used for general cutting. Available in flat, ball-nose, and tapered styles.
- Drill Bits: Best for making precise holes.
- Engraving Bits: Designed for fine detail work.
- Laser Heads: Found on laser CNC machines. No physical contact with the material.
How to Change a Tool Without Causing Damage
- Turn off the machine before switching tools.
- Loosen the collet or chuck and remove the old bit.
- Insert the new tool and tighten it securely. A loose bit can vibrate and ruin your cut.
- Double-check the tool length. If it sticks out too far, it can snap under pressure.
Calibrating and Zeroing the Machine
If your CNC machine isn’t zeroed correctly, it has no idea where to start. That can mean wasted material or worse, cutting into the worktable. I once skipped this step and ended up with a deep groove in my table. Lesson learned.
How to Set Zero Points
- Move the spindle to the starting point of your material.
- Set X and Y zero (left-right and front-back position).
- Lower the tool until it just touches the material, then set Z zero (up-down position).
- Run a dry test with the spindle off to make sure everything aligns.
Checking for Tool Offset and Alignment
- Some tools are cut slightly off-center, adjust this to your software if needed.
- Make sure the workpiece is perfectly aligned with the machine’s axis.
- Even a small misalignment can cause crooked cuts.
I used to think setup was just a small step before running a job. But I’ve learned that a few extra minutes of preparation can save hours of frustration. Once everything is properly loaded, clamped, and calibrated, you’ll be ready to start cutting with confidence.
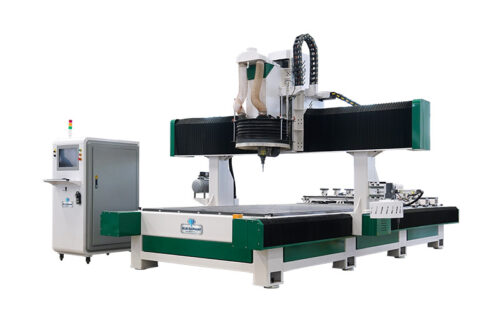
At Blue Elephant, our CNC machines are designed for easy setup and precision cutting, helping you streamline your workflow. Whether you’re working on furniture, signs, or industrial parts, a well-prepared machine delivers the best results every time.

4. Creating and Uploading a CNC Program
CNC machines don’t think for themselves. They need clear instructions to follow. The first time I loaded a file without checking the settings, my machine cut too deep, the bit snapped, and the workpiece was ruined. That mistake cost time, money, and a lot of frustration.
A well-prepared CNC program ensures accurate cuts, smooth movements, and fewer mistakes. To get there, you need to create a design, convert it into toolpaths, and upload the file correctly. Let’s go step by step.
Understanding CAD and CAM Software
CNC machines can’t read standard design files like JPEGs or PDFs. Instead, designs are created using CAD (Computer-Aided Design) software, then processed into toolpaths with CAM (Computer-Aided Manufacturing) software.
Popular CAD/CAM Software Options
- Fusion 360: Powerful 3D modeling and machining.
- VCarve: Great for woodworking and sign-making.
- Easel: Web-based and beginner-friendly.
- Mach3: Often used to control CNC machines directly.
How to Convert a Design into Toolpaths
- Create or import a design into CAD software.
- Define toolpaths in CAM software:
- Choose the right cutting tool.
- Set cutting depth and feed rate.
- Select cutting strategies (pocketing, profiling, or engraving).
- Export the file as G-Code, the language that controls CNC machines.
Generating G-Code: What You Need to Know
G-Code is the set of instructions that tells the CNC machine exactly what to do. Every movement, spindle speed, and cutting depth is defined by these commands.
Key Parts of G-Code
- Movement commands (G00, G01): Control the tool’s position.
- Spindle speed (S1000, S2000): Determines how fast the cutting tool spins.
- Feed rate (F100, F200): Controls how fast the tool moves through the material.
Adjusting Cutting Depth, Feed Rate, and Spindle Speed
- Too fast? The tool may overheat or break.
- Too slow? The material could burn, and edges may come out rough.
- Cutting too deep? The tool can snap, or the motor may struggle.
I once tried cutting aluminum without adjusting the feed rate. The tool bit into the material too aggressively and jammed the spindle. A slower pass made all the difference.
Uploading G-Code to the CNC Machine
Once the G-Code file is ready, it needs to be sent to the machine.
Ways to Transfer the File
- USB Drive – A simple and reliable method.
- WiFi Connection – Some CNCs allow direct wireless transfers.
- Direct Connection – If using software like Mach3, files can be sent from a computer.
Running a Simulation Check Before Cutting
A dry run (running the program with the spindle off) is an easy way to prevent mistakes.
- Check if the toolpaths match the design.
- Watch for unexpected movements or errors.
- Confirm that spindle speed and feed rate are set correctly.
Skipping this step has led to ruined workpieces more times than I’d like to admit. Now, I always run a quick check before cutting. It takes a minute but saves hours of frustration.
A CNC machine is only as good as the program running it. Taking the time to create, convert, and upload a well-prepared CNC file will save material, prevent tool damage, and improve accuracy. With practice, programming will become second nature, making the whole process smoother and more efficient.

5. Running the CNC Machine: Step-by-Step Operation
There’s nothing more satisfying than watching a CNC machine make a perfect cut. But that only happens when everything is set up correctly—the right file, the right tool, and the right settings. I’ve made the mistake of skipping steps, only to end up with ruined material or broken bits.
Running a CNC machine isn’t just about pressing “start.” It requires safety checks, monitoring, and quick adjustments if something goes wrong. Here’s how to do it right.
Starting the Machine Safely
Before cutting anything, it’s important to make sure everything is working properly. A simple mistake here can lead to wasted material—or worse, a damaged machine.
Steps for a Safe Start
- Run a test cycle (dry run): This moves the tool along the cutting path without touching the material. It helps catch positioning errors before making a cut.
- Check toolpaths for errors: Look at the preview in your software to ensure the machine will cut in the right place and at the right depth.
- Confirm the spindle speed and feed rate: If these settings are wrong, the tool could snap or the material could burn.
- Double-check clamps and fixtures: If the workpiece moves mid-cut, accuracy is lost.
Skipping these steps has cost me broken tools and wasted materials. A quick check now saves frustration later.
Monitoring the Cutting Process
Once the machine starts cutting, the job isn’t over. Keeping an eye on the process helps prevent mistakes before they happen.
What to Watch For
- Tool wear: Dull tools create rough edges and slow down cutting. Listening to changes in sound—squealing or grinding often means a tool is worn.
- Material shifting: If the workpiece moves even slightly, the entire cut can be off.
- Overheating: Metal and plastic can get too hot, causing burns or melting. If you notice smoke or discoloration, it’s time to adjust settings.
How to Adjust Mid-Process
- Lower the feed rate if the tool is struggling.
- Increase spindle speed if the cut is rough or jagged.
- Pause the job if you see a problem—better to stop and fix it than ruin an entire piece.
I once ignored a small vibration in my workpiece, thinking it wasn’t a big deal. A few seconds later, the bit snapped. That mistake could have been avoided with a quick pause and a clamp adjustment.
Troubleshooting Common Issues
Even with careful preparation, problems still happen. Knowing how to fix them quickly saves time and prevents damage.
Machine Not Responding?
- Checking power connections—loose cables to stop everything.
- Look for an emergency stop button that may have been pressed.
- Review the G-Code file for errors—an incorrect command can halt the process.
Inaccurate Cuts?
- Inspect the tool for wear—a dull tool won’t cut cleanly.
- Check if the workpiece is secure—even a small movement can shift the cut.
- Look for backlash (loose machine parts)—worn-out bearings or belts can create inconsistencies.
Overheating or Burning Edges?
- Lower the spindle speed to reduce friction.
- Increase the feed rate, so the tool moves faster, reducing heat buildup.
- Use coolant or compressed air to keep materials cool.
A CNC machine runs best when you stay involved. Small adjustments and careful monitoring make the difference between a perfect cut and a costly mistake. Taking the time to check settings, run a dry test, and watch for issues leads to better results—and fewer headaches.

6. Post-Processing and Finishing Your Workpiece
There’s nothing like the moment a CNC job is finished. The machine stops, the workpiece is complete, and you’re ready to see the final result. But the job isn’t over yet. A great CNC cut still needs proper finishing.
I’ve learned that rushing this step can ruin hours of work. Removing the piece too quickly, skipping sanding, or applying the wrong finish can leave rough edges, dust marks, or an uneven surface. Let’s go through how to get the best final product.
Removing the Finished Product Safely
A common mistake is forcing the workpiece out of the clamps or pulling too hard. This can cause chips, cracks, or even bend delicate parts.
How to Remove the Workpiece Without Damage
- Loosen clamps gradually. If the piece sticks, wiggle it gently instead of yanking.
- Use a plastic scraper or a soft tool if the workpiece is glued or held by double-sided tape.
- Check for small tabs or supports left from the cutting process. Snip or sand them off instead of forcing them.
Once it’s free, cleaning comes next.
Cleaning Off Dust and Debris
CNC cutting creates dust, shavings, and sometimes sticky residue. Cleaning your workpiece properly makes a big difference in how well paint, stain, or coatings apply.
- Use compressed air or a soft brush to remove fine dust.
- Wipe with a damp cloth to get rid of leftover debris.
- For metal parts, use isopropyl alcohol to remove oils before finishing.
Sanding, Polishing, and Surface Treatment
CNC machines are precise, but they can still leave rough edges and tool marks. Smoothing the surface improves both appearance and durability.
Smoothing Rough Edges
- For wood: Use medium-grit sandpaper (150-220 grit) for general smoothing, then finish with finer grit.
- For metal: Use a deburring tool to remove sharp edges, then polish with a fine abrasive pad.
- For acrylic or plastic: Start with wet sanding (400+ grit) and finish with a polishing compound for a glossy surface.
Applying Finishes
A good finish protects the material and enhances the final look. Choosing the right one depends on the workpiece.
- Wood: Apply stain, oil, or varnish for color and protection.
- Metal: Use a clear coat or rust-resistant paint for durability.
- Plastic & Acrylic: Use a flame polisher or buffing wheel for a clean, glossy finish.
Post-processing is where a rough cut turns into a professional-looking final product. Taking a little extra time to remove, clean, sand, and finish properly makes all the difference. After all, a great CNC project isn’t just about the cut—it’s about how it looks and lasts when it’s done.
7. Maintaining Your CNC Machine for Long-Term Use
A CNC machine is an investment. Whether you’re running a business or using it for personal projects, keeping it in good shape means fewer breakdowns and more precise cuts. I’ve learned that regular maintenance saves time, money, and frustration.
Skipping maintenance? That leads to worn-out parts, inaccurate cuts, and sudden failures—usually at the worst possible time. A little routine care goes a long way.
Daily Maintenance Checklist
Before and after each use, a quick cleanup and inspection can prevent bigger problems.
- Remove dust and debris: CNC machines create a lot of dust and shavings. A quick vacuum or brush-off keeps moving parts from clogging.
- Wipe down the machine: Metal shavings and dust can cause wear over time. A simple wipe with a dry cloth helps.
- Check for loose bolts or connections: Vibrations from cutting can loosen fasteners. A quick tightening prevents long-term damage.
- Inspect the cutting tool: A dull or chipped bit affects accuracy and puts extra strain on the machine.
Spending a few minutes on daily maintenance keeps things running smoothly.
Weekly and Monthly Maintenance
Long-term care prevents expensive repairs and unexpected downtime.
Lubricating Moving Parts
Friction wears out components fast. Keeping rails, lead screws, and bearings lubricated reduces strain and extends machine life.
- Use the right lubricant for your machine type (check the manual).
- Avoid over-lubrication, which attracts dust and grime.
Inspecting Tools and Replacing Worn-Out Bits
A dull tool forces the machine to work harder and causes rough cuts.
- Replace bits that show wear, chipping, or burning.
- Store tools properly to prevent rust or damage.
Checking Belts and Drive Motors
Belts and motors wear out over time, affecting precision.
- Look for cracks, fraying, or loose belts. A slipping belt causes accuracy issues.
- Listen to unusual noises from the motors. Grinding or clicking often means something is misaligned.
Regular maintenance doesn’t take much time, but it makes a big difference. A well-maintained CNC machine lasts longer, runs smoother, and produces better cuts.
A little effort each day, plus deeper checks every few weeks, keeps your CNC machine working like new. More importantly, it prevents those frustrating breakdowns that always seem to happen right before a big project.
8. Advanced Tips for Optimizing CNC Performance
Once you’ve mastered the basics, small adjustments can make a big difference in speed, accuracy, and material use. I used to focus only on getting clean cuts, but over time, I realized that efficiency matters just as much. The right settings and techniques can reduce waste, cut production time, and even extend the life of your tools.
Let’s go over some key ways to improve CNC performance.
Improving Cutting Speed and Efficiency
A CNC machine is only as fast as its settings allow. Dialing at the right feed rate and spindle speed for each material helps avoid overheating, tool wear, and rough edges.
Key Adjustments for Better Performance
- Increase the feed rate if the machine is cutting too slowly and causing burns.
- Lower feed rate if the tool struggles or leaves rough edges.
- Match spindle speed to the material—wood, metal, and plastic all require different speeds to get clean results.
Cutting Strategies Matter
- Climb Cutting: The tool moves in the same direction as the material feed. Leaves a smoother finish but requires a rigid machine.
- Conventional Cutting: The tool moves against the feed direction. More stable but can cause rougher cuts.
I used to ignore these details, but once I started tweaking them, I got cleaner cuts in less time with less tool wear.
Reducing Waste and Material Costs
CNC materials aren’t cheap. Maximizing each sheet or block makes a big difference over time.
How to Use Material More Efficiently
- Nesting parts in software: Arrange pieces close together to use the least amount of material.
- Choosing the right cutting order: Cutting inside shapes before outside edges prevents movement and reduces waste.
A few simple changes in setup saved me both material and money. It’s one of the easiest ways to improve efficiency.
The tool moves against the feed direction. More stable but can cause rougher cuts.
I used to ignore these details, but once I started tweaking them, I got cleaner cuts in less time with less tool wear.
Integrating Automation for Higher Productivity
The more time you save in setup, the more time the CNC machine spends cutting. A well-optimized workspace and workflow keep things running smoothly.
Ways to Speed Up Production
- Use an automatic tool changer: Eliminates the need to manually swap bits between cuts.
- Implement vacuum tables or clamps: Faster and more secure than manual clamping.
I used to spend too much time reclamping materials and switching tools manually. After upgrading to a vacuum table and better work-holding methods, setup became faster, and jobs ran more smoothly.
Fine-tuning your CNC process doesn’t just improve speed—it saves money, extends tool life, and reduces waste. A few small changes in feed rates, cutting order, and setup efficiency can lead to better results with less effort.
The key is to experiment, adjust, and refine. Once you start optimizing, your CNC machine will run smoother, faster, and more efficiently than ever.
Conclusion
Learning to use a CNC machine takes time, but every step brings you closer to precision, efficiency, and creative freedom. From setup to cutting, from troubleshooting to optimizing—each skill builds on the last.
Remember the mistakes I made? The broken bits, the misaligned cuts? You don’t have to repeat them. You’re now equipped with the knowledge to get it right.
So, what’s stopping you? Your CNC machine is waiting.
Take action. Run your first job. Start creating today.
Need guidance? Contact us today to get started!
Explore Related Resources
For more in-depth knowledge, take a look at these recommended reads. We think you’ll find them useful:
Getting Started with CNC
Step-by-Step Processes
- CNC Machine Installation: A Step-by-Step Guide
- CNC Machine Process: A Step-by-Step Guide
- CNC Machine Assembly Process: A Step-by-Step Guide
- CNC Machine Manufacturing Process: A Step-by-Step Guide
Still haven’t found what you’re looking for? Don’t hesitate to contact us. We’re available around the clock to assist you.